8 Creative Ways to Use Masks for Editing Photography
There are many creative uses for masking software, however they may not be evident at first. Read on for a list of ideas to try on what you can achieve using the new Version 5 of Topaz ReMask! For the release they are offering it at $20 off this week, simply remember to use the discount code GetReMask5 at checkout. Deal found here: Topaz ReMask at $20 Off
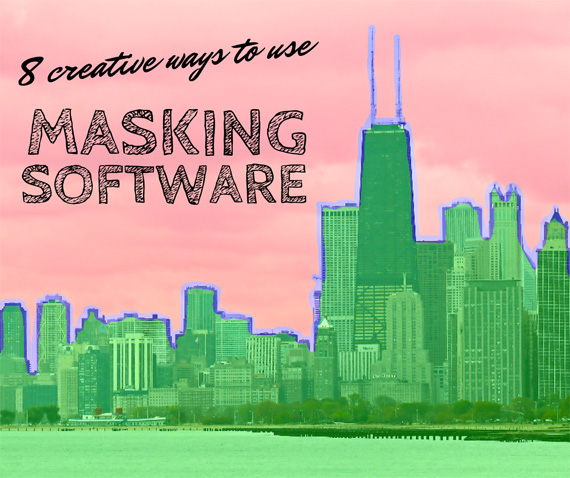
8 Creative Ways to Use Masking Software
1. Enlarge a Moon
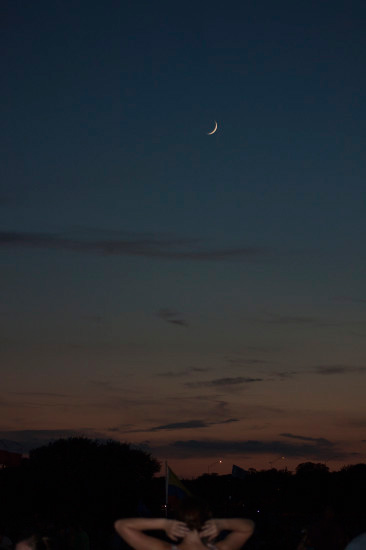
Photographing the Moon
The raw image below was snapped at a focal length of 75mm. The zoom lens I was using goes to 200mm, however I wanted to capture the entire scene–the crescent moon along with the girl looking up as if she was in awe.
Moonstruck
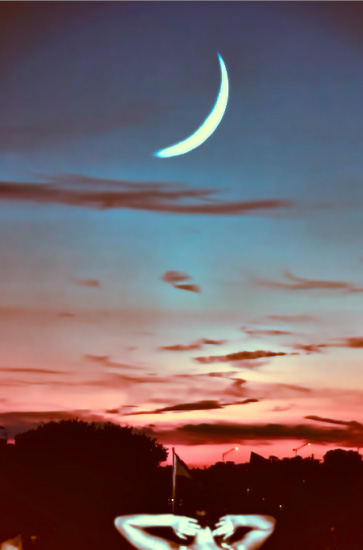
Final Image
According to sources, “this full moon is not only the closest and largest full moon of the year. It also presents the moon’s closest encounter with Earth for all of 2014.” (earthsky.org)
If you’re lucky enough to own a telescopic lens or looking to rent one, now’s the time! Topaz user Gary Lamott was able to capture this image of a super, bloodmoon from this year:
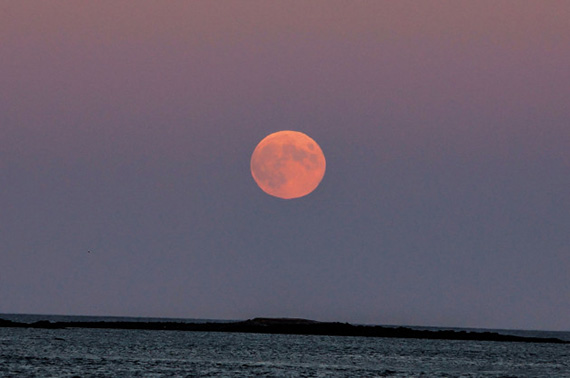
Bloodmoon
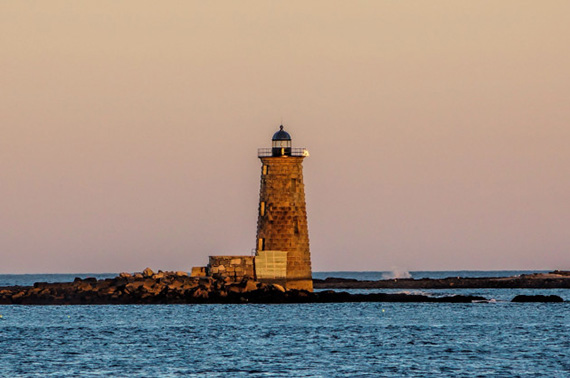
Lighthouse
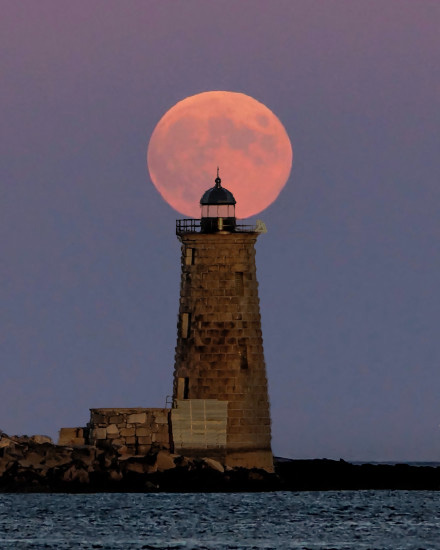
Final Image
2. Compositing
A composite is an assemblage of two or more images to create a final one. Typically you’ll start with a background image and then extract elements from other images and place them into the background to create a new piece of art.Inspired by the painter Rene Magritte, Topaz user Robyn Aber created her own composite by extracting elements from their background using Topaz Remask and placing them into an entirely new background.
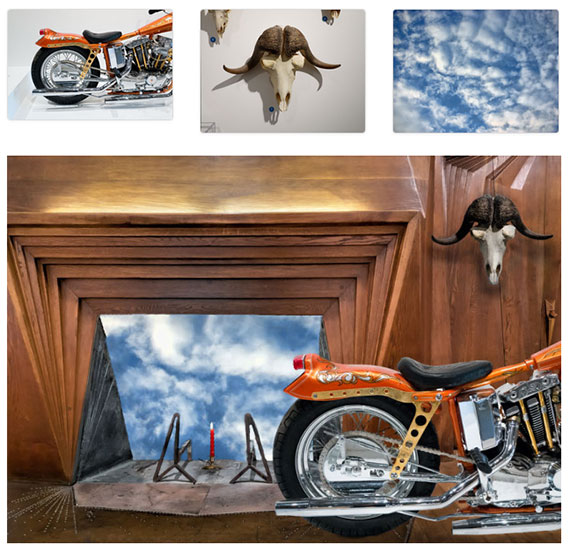
Topaz Remask Composite
Another example comes to us from Adrian Theze of The Digital Lightroom, who used Topaz ReMask to isolate the moon, clouds and the silhouette figure from other photographs to create this final composition:
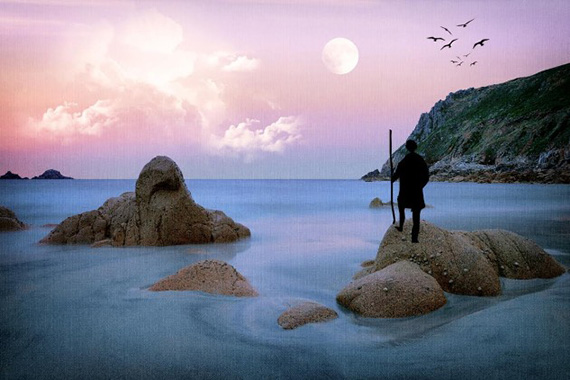
Composite by Adrian Theze
3. Selective Adjustments
Using masking software doesn’t just have to be used for extracting an object from its background and placing it onto a new one. Isolating part of your image for selective adjustments is another way to use masking software.For instance, Topaz user Gary Lamott brought this image of bottles into ReMask. By isolating a single bottle, he was able to paint in blue specifically to that extraction without affecting the surrounding areas.
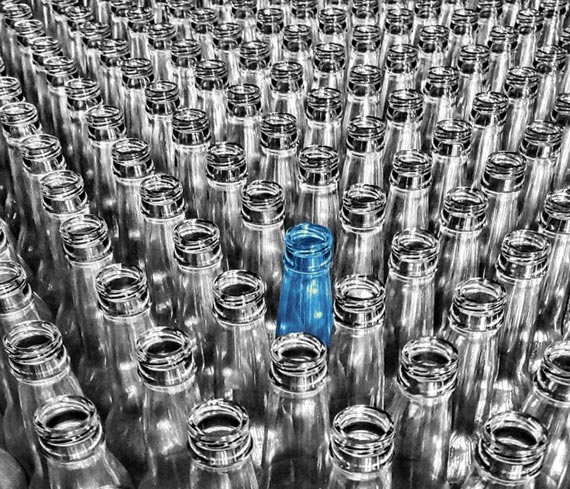
“There is one in every crowd” by Gary Lamott
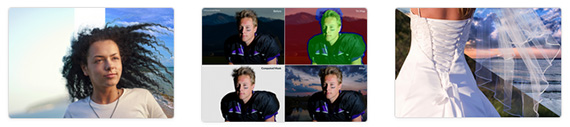
Fine art architectural photographer Julia Anna Gospodarou also uses masking software in her post-processing workflow for selective adjustments.
She claims, “Working selectively with light on different areas of the image lays at the core of my processing workflow, thus selections and masking are among the most vital tools I use to create a photograph.”
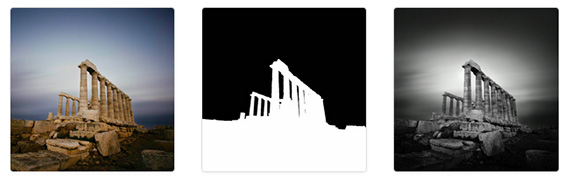
As you can see above, Gospodarou was able to isolate the subject with Topaz ReMask so that she could specifically work with the sky and background, without affecting the architecture.
Another example of selective adjustments that may spark some ideas can be found in this tutorial, covering how to transform your image into a surreal piece of art, where ReMask was used to isolate a tree. The tree was then enhanced with Topaz Clarity and Clean, while the background was manipulated with Topaz Lens Effects.
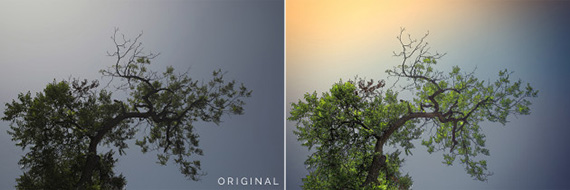
Transforming an image into a surreal piece of art
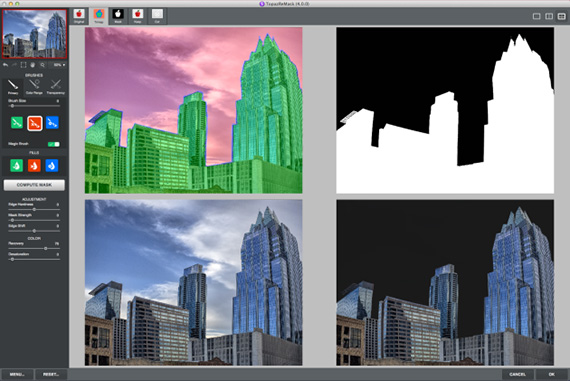
4. Conquer Skies
Often weather isn’t the most ideal on a photo shoot, however with masking software you can easily extract a boring background and replace it with a more eye-catching one.In this tutorial covering a creative sky replacement with ReMask 4, the landscape is extracted and the dull sky replaced with beautiful, fluffy clouds (which are then reflected into the water).
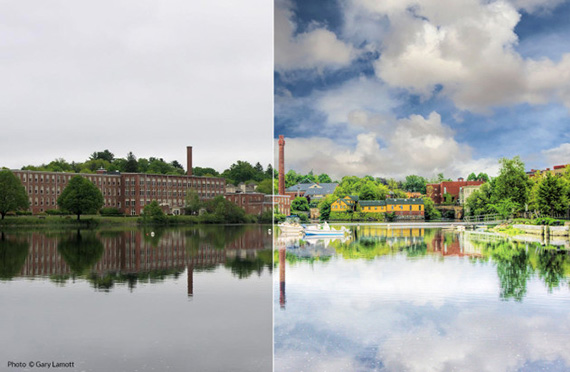
Another reason you may want to extract a sky is to avoid noise artifacts. We often receive comments from customers, frustrated as to why noise, haloing and banding has formed in their sky during the editing process.
A common reason for this is because they have pushed the edits too far, more than the sky can handle. A simple solution is the mask out the sky and only edit the landscape, cityscape, or whichever part of the image is less susceptible to forming artifacts.
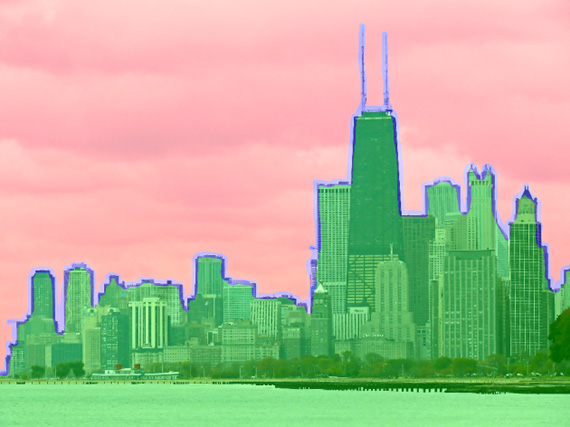
Isolate a cityscape from the sky using Topaz ReMask 4
5. Blur a Background
Blurring out a background can be a preferable choice should you want to de-focus distracting elements and direct the eye more towards the subject in focus.The image below was taken with a cell phone and I did not have entire control over the depth of field. Preferably I’d like the background to be more out of focus and the recycle bin to be less detectable.
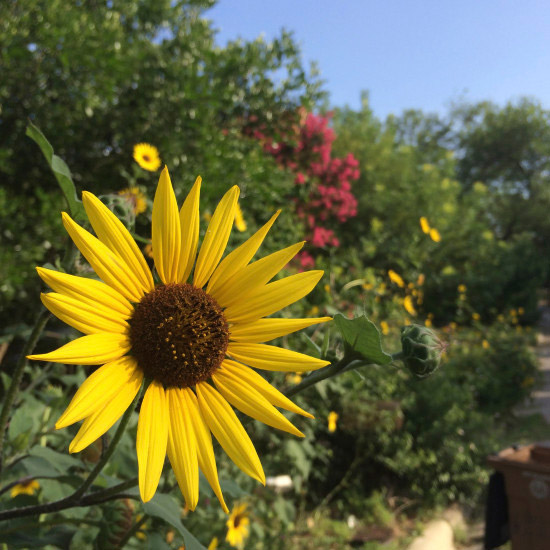
Sunflower
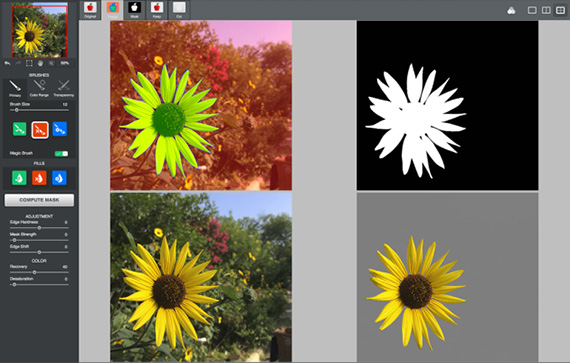
Once the flower was extracted, I then brought the background (original) image into Topaz Lens Effects, which contains several blur options including selective bokeh, tilt-shift and creative blur. For a quick background blur, I applied a tilt-shift blur as shown, focusing specifically on the right side of the image.

Back in Photoshop, I added a vector mask to the layer. I then inverted the mask (ctrl/cmd + I) and then used the brush tool (B) to paint in the blur on the right side of the image, and at a lighter opacity to the left side.
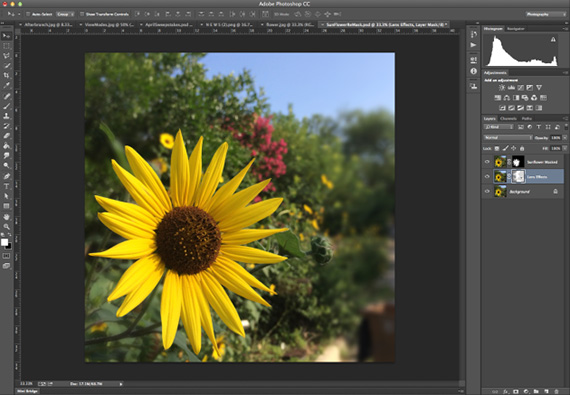
When painting in the effect, you’ll see white appear in the vector mask in your layers panel. Just remember, white = keep & black = remove. So the white brush will be painting in the blur effect, while the black section of the mask will remove the effect.
To toggle between the white (keep) brush and black (remove) brush, simply press the X key. With a brush at a reduced opacity you can make the blur as strong or light as you’d like.
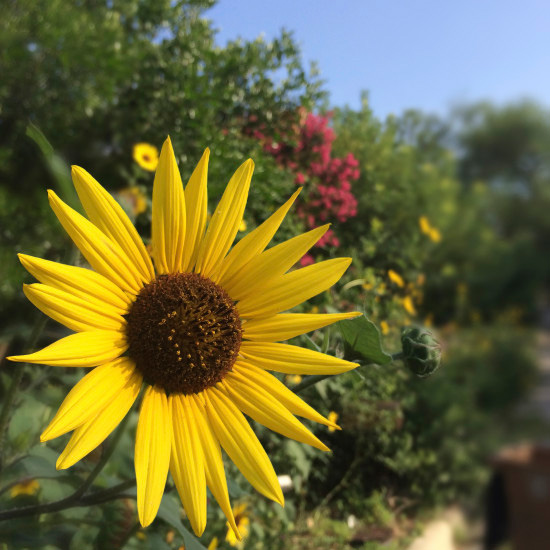
Sunflower with Blur Effect
6. Remove Smoke from Fireworks
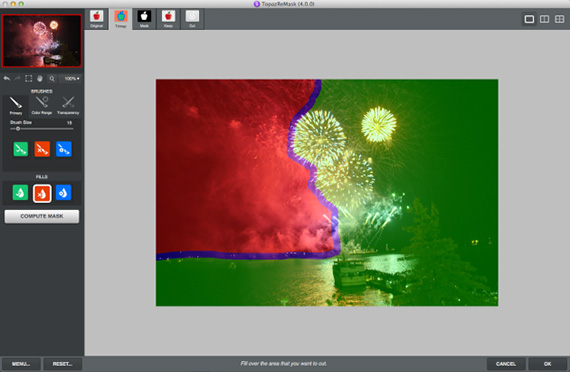
Topaz user Sheila Kimmel recently sent a request to our customer support account, asking how to remove the heavy smoke in her fireworks image using masking software.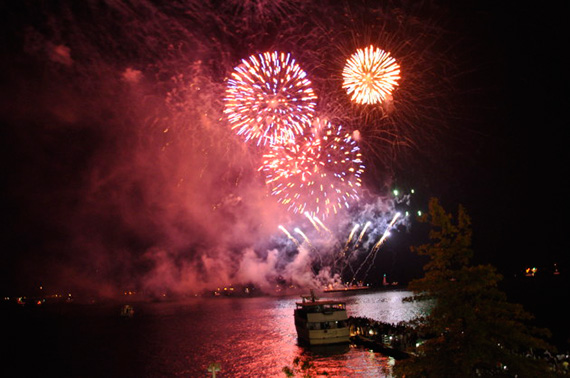
Photo © Sheila Kimmel
Here’s what I did in ReMask using the Blue Primary brush to create an outline and then the red fill tool to fill in the background (cut).
I then made a few refinements and reduced the mask’s hardness.
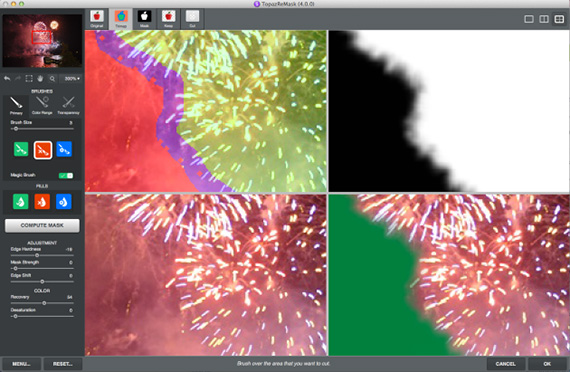
After pressing OK to bring this selection back to a new layer in Photoshop, I then duplicated the original background layer.
With the background layer selected, I then used the Clone Stamp tool (shortcut key: S) to clone sections of the pure black sky in the right side of the image (hold down option/alt key to sample) and stamp it to the other side. Be sure to reduce the opacity of the clone stamp brush, especially around the edges of the fireworks.
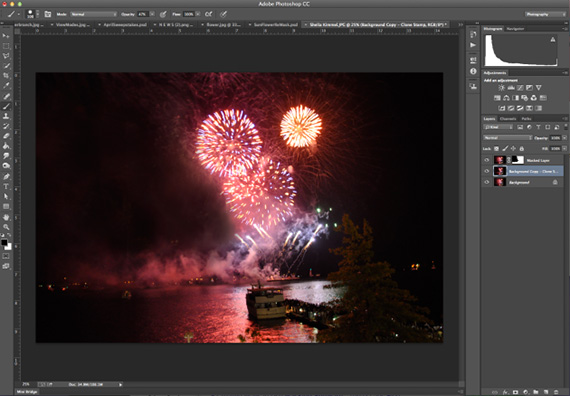
You can then use other available tools in Photoshop to help the masked layer blend in better…such as the blur, smudge, burn and dodge tools.
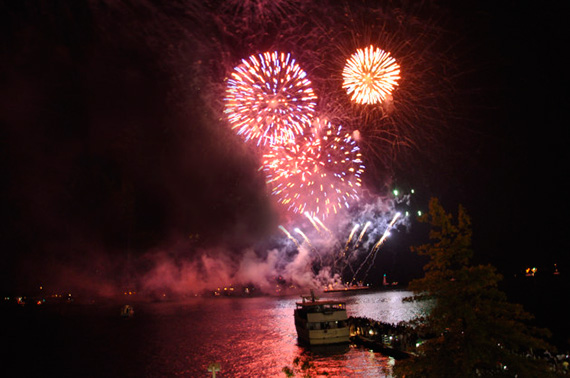
Although not perfect, hopefully you get the general idea of how masking software can be used help remove smoke or other distracting elements.
7. Center a Subject
Rather than sacrificing your background by cropping it to center a subject, use masking software to extract it and place it somewhere else. Professional stock and travel photographer Scott Stulberg demonstrates this process with his two images below: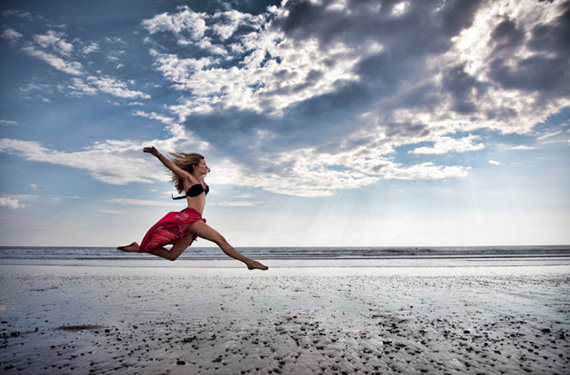
Before ReMask
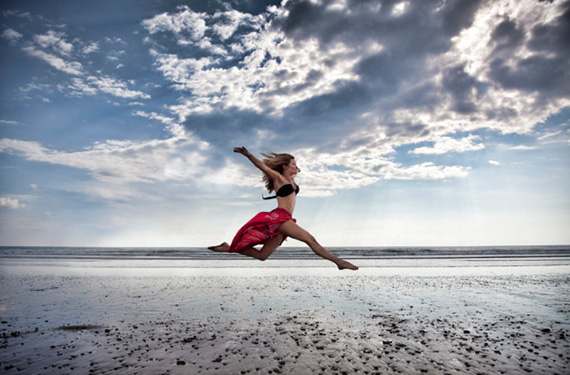
After ReMask
8. Portraiture, Sports, and Wedding Photography
We often receive many requests from portrait photographers who wish to extract their subject from a background and place them somewhere new.In the particular example below, Topaz user Randy Soop was have difficulty extracting the image he took of a ballerina from the background, especially in the tutu:
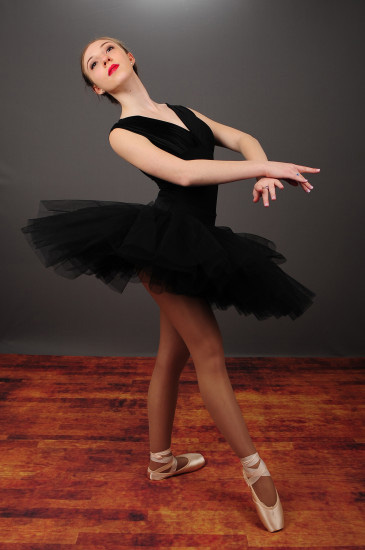
photo by Randy Soop
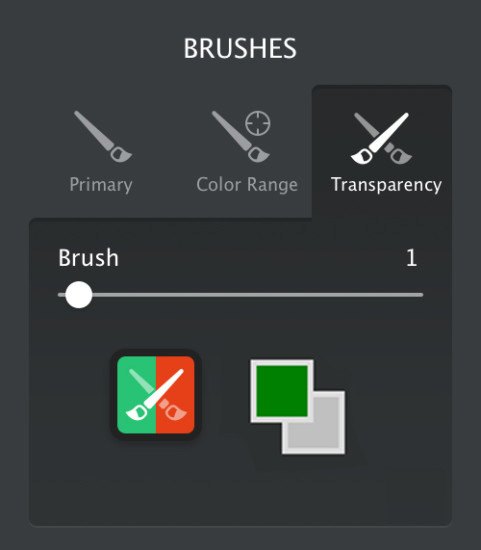
Transparency Brush

Changing Backgrounds
 And there you have it!
Discount Ending Soon on the New Topaz ReMask 5:
Topaz is offering a discount on their new ReMask 5 until the middle of the month. Test the program with a 30-day trial, or purchase the program for $20 off until the end of September 18, 2015 by applying the code: GetReMask5.Offer found here: Topaz ReMask 5 at $20 Off
Go to full article: 8 Creative Ways to Use Masks for Editing Photography
What are your thoughts on this article? Join the discussion on Facebook or Google+
Article from: PictureCorrect