Thursday, March 10, 2016

Canon announces budget-friendly EOS Rebel T6 (1300D)


 Canon has announced its latest entry-level DSLR, the Rebel T6, which is known as the EOS 1300D in most regions. The T6 is a relatively minor update to the Rebel T5 (EOS 1200D) and adds a faster Digic 4+ processor, higher resolution LCD, 'white priority' WB mode (which produces more neutral color in tungsten lighting), a food scene mode and Wi-Fi with NFC.

 The T6 retains the same 18MP APS-C CMOS sensor, 9-point AF system, Full HD video capture and numerous scene and creative modes as its predecessor.
The Rebel T6 will ship in the US next month at a price of $ 549, which includes the 18-55mm F3.5-5.6 IS II lens.


Press release:

Share moments on-the-go with the new Canon EOS Rebel T6 DSLR Camera

Become the next Internet sensation with built-in Wi-Fi®and NFC connectivity*
MELVILLE, N.Y., March 10, 2016 – Canon U.S.A., Inc., a leader in digital imaging solutions, today announced its newest entry-level DSLR camera, the EOS Rebel T6. The Canon EOS Rebel T6 camera offers easy sharing of high quality photos and videos to popular social media sites via compatible smartphones and other mobile devices* as well as Canon’s Connect Station CS100.
“Smartphone users passionate about photography and ready to take that next step to creating their best images and videos ever will appreciate the ease-of-use and affordability of the new EOS Rebel T6 camera,” said Yuichi Ishizuka, president and COO, Canon U.S.A., Inc. “With the latest addition of the EOS Rebel T6 camera, the Canon EOS Rebel series continues to be one of the most popular DSLR camera lines on the market.”
The Canon EOS Rebel T6 DSLR camera offers a wide range of features including:
  • 18.0 Megapixel Canon CMOS (APS-C) image sensor and high-performance DIGIC 4+ Image Processor for excellent image quality and speedy operation.
  • ISO 100–6400 (expandable to H: 12800) for shooting from bright light to low light.
  • Built-in Wi-Fi® and NFC connectivity* for easy sharing to smart devices, social media sites and the Canon Connect Station CS100 device.
  • 9‐point AF system (including one center cross‐type AF point) and AI Servo AF provide impressive autofocus performance with accurate results.
  • High-performance Optical Viewfinder helps facilitate quick and accurate focusing by firmly framing and capturing the subject at hand.
  • Large, 3.0-inch LCD monitor with 920,000 dots for easy viewing and reviewing.
  • Full HD video mode for high quality, easy-to-use video capture.
Missed Photo Ops a Thing of the Past
The Canon EOS Rebel T6 camera provides a wide ISO range of 100-6400 (expandable to ISO 12800), making it ideal for shooting both still and moving subjects in a wide variety of lighting conditions ranging from low light to bright sunny days. In addition, the camera is capable of shooting high-resolution 18 megapixel still photos continuously up-to-three frames per second (fps), with predictive autofocus to help keep every image sharp and clear, even with moving subjects.
The Scene Intelligent Auto mode in the Canon  EOS Rebel T6 camera analyzes the image, accounting for faces, colors, brightness, moving objects, contrast and whether the camera is handheld or on a tripod. Scene Intelligent Auto mode then chooses the exposure and enhancements that can bring out the beauty in virtually any scene or situation. Simplifying DSLR image capture, Scene Intelligent Auto mode lets you concentrate on composing images without puzzling over settings.
Another exciting addition to the Canon EOS Rebel T6 camera is a new ‘Food Mode’ on the mode dial for the foodie or blogger to easily capture stunning images of the food they love. This mode enhances the color and brightness of the food images while at the same time making the images ready to share. Other fully automatic exposure modes include portrait, night portrait, landscape, sports, and close-up. Additionally, the easy-to-use Full HD video mode captures sharp, high-definition video up to 1080p resolution with the choice of automatic or manual focusing. Creative filters such as Fisheye, Toy Camera, Miniature, and Soft Focus give users additional ways to create fun and imaginative images to enjoy, print and share.  The camera’s new “white priority” Auto White Balance setting enables users to create images with a more neutral tone when shooting under incandescent lighting. In addition to all the automatic modes, the new Canon EOS Rebel T6 camera provides complete manual exposure and focus controls plus RAW image output for advanced amateur photographers and photography students.
The Canon EOS Rebel T6 camera is compatible with the entire Canon EF and EF-S lens system including over 60 current models enabling users to capture their world in different perspectives ranging from Fisheye to Super-Telephoto. Scheduled for availability in April 2016, the estimated retail price of the Canon EOS Rebel T6 camera will be $ 549.99** when bundled with the EF-S 18-55mm f/3.5-5.6 IS II standard zoom lens.
* Compatible with iOS® versions 7.1/8.4/9.0, AndroidTM smartphone and tablet versions 4.0/4.1/4.2/4.3/4.4/5.0/5.1.  Data charges may apply with the download of the free Canon Camera Connect app. This app helps enable you to upload images to social media services. Please note that image files may contain personally identifiable information that may implicate privacy laws. Canon disclaims and has no responsibility for your use of such images. Canon does not obtain, collect or use such images or any information included in such images through this app.
**Availability, prices, and specifications are subject to change without notice. Actual prices are set by individual dealers and may vary.

Canon EOS Rebel T6 / EOS 1300D specifications

Price
MSRP$ 549.99 (with 18-55mm F3.5-5.6 IS II lens)
Body type
Body typeCompact SLR
Body materialComposite
Sensor
Max resolution5184 x 3456
Other resolutions3456 x 2304, 2592 x 1728, 1920 x 1080, 720 x 480
Image ratio w:h1:1, 4:3, 3:2, 16:9
Effective pixels18 megapixels
Sensor photo detectors19 megapixels
Sensor sizeAPS-C (22.3 x 14.9 mm)
Sensor typeCMOS
ProcessorDigic 4+
Color spacesRGB, AdobeRGB
Color filter arrayPrimary color filter
Image
ISOAuto, ISO 100-6400, expandable to 12800
Boosted ISO (maximum)12800
White balance presets6
Custom white balanceYes
Image stabilizationNo
Uncompressed formatRAW
JPEG quality levelsFine, Normal
File format
  • JPEG
  • RAW (Canon CR2, 14-bit)
Optics & Focus
Autofocus
  • Contrast Detect (sensor)
  • Phase Detect
  • Multi-area
  • Center
  • Selective single-point
  • Tracking
  • Single
  • Continuous
  • Face Detection
  • Live View
Autofocus assist lampYes (flash)
Digital zoomNo
Manual focusYes
Number of focus points9
Lens mountCanon EF/EF-S
Focal length multiplier1.6×
Screen / viewfinder
Articulated LCDFixed
Screen size3″
Screen dots920,000
Touch screenNo
Screen typeTFT LCD
Live viewYes
Viewfinder typeOptical (pentamirror)
Viewfinder coverage95%
Viewfinder magnification0.8×
Photography features
Minimum shutter speed30 sec
Maximum shutter speed1/4000 sec
Exposure modes
  • Scene Intelligent Auto
  • Program
  • Shutter Priority
  • Aperture Priority
  • Manual
Scene modes
  • Landscape
  • Close-up
  • Sports
  • Food
  • Night Portrait
Built-in flashYes (Pop-up)
Flash range9.20 m (at ISO 100)
External flashYes (via hot shoe)
Flash modesAuto, On, Off, Red-eye
Flash X sync speed1/200 sec
Drive modes
  • Single
  • Continuous
  • Self-timer
  • Continuous w/self-timer
Continuous drive3.0 fps
Self-timerYes (2 or 10 sec)
Metering modes
  • Multi
  • Center-weighted
  • Partial
Exposure compensation±5 (at 1/3 EV, 1/2 EV steps)
AE Bracketing±2 (3 frames at 1/3 EV, 1/2 EV steps)
WB BracketingYes
Videography features
Resolutions1920 x 1080 (30p, 24p), 1280 x 720 (60p), 640 x 480 (30p)
FormatMPEG-4, H.264
MicrophoneMono
SpeakerMono
Storage
Storage typesSD/SDHC/SDXC card
Connectivity
USBUSB 2.0 (480 Mbit/sec)
HDMIYes (mini-HDMI)
Microphone portNo
Headphone portNo
WirelessBuilt-In
Wireless notes802.11b/g/n with NFC
Remote controlYes (wired or wireless)
Physical
Environmentally sealedNo
BatteryBattery Pack
Battery descriptionLithium-Ion LP-E10 rechargeable battery & charger
Battery Life (CIPA)500
Weight (inc. batteries)485 g (1.07 lb / 17.11 oz)
Dimensions129 x 101 x 78 mm (5.08 x 3.98 x 3.07″)
Other features
Orientation sensorYes
GPSNone 

Articles: Digital Photography Review (dpreview.com)

If you are interested in Digital Camera, check it out here for more details.


The Importance of Constructive Feedback in Photography


Most of us have received critiques of our work at some point of our life. Some of the most subjective feedback is that directed at works of art. Photography is no exception.
With a lot of people picking up photography as a hobby, it’s no wonder that a lot of photography related forums are created with the purpose of sharing. And one of the popular subjects of these groups is critique, where members get to give “constructive” comments with the hope that it will help the image maker. The reverse is also true where a photographer posts his best shot and hopes to get constructive and helpful criticism in order to learn from the more experienced photographers.
american beach photo
Photo by Kim Seng.
When I took a course on image analysis with the Photographic Society of America (PSA), when I first started photography, the most important aspect I learned about giving constructive feedback is to put it forth as my own point of view.
Why is this “own point of view” so important?
Photography is so subjective that an image can gather equal amount of “likes” and “dislikes” at the same time. My tutor told me that it is subjective to the point of being ridiculous. Each and every one of us perceives beauty in our own way. Not just beauty, but almost everything in life, right? Some of us like eating steak, while some would rather stay away from meat. Some of us like to remain single, while some would rather marry and have 10 children.
That being said, the image maker, too, perceives beauty differently from the one critiquing the work. To the one posting the image, it might be his best shot and he thinks of it as being perfect. I’ve been there when I started photography. I thought what I’d shot was very good. Boy was I wrong. If I were to look back at my very first batch of photographs, I would be appalled and would give myself the harshest of critiques. But hey, we were all once amateurs. And everyone is learning all the time and wants to improve. So the main thing is not to belittle anybody, because we were most likely in their shoes at some point.
asian photography
Photo by Sakhar Nair; ISO 400, f/11, 1/1600 exposure.
So, if we don’t have the “eyes” now to critique and comment on our current work, what better way than to ask those who have been there done that. A word of caution: when you put your work out there in the open, be prepared and open minded to receive comments and criticism from those who have not been there done that.
Sometimes, you can get ideas spinning off from even those who are very new to the art of photography.
Back to the subject of “own point of view,” it’s imperative that we start off our critiques with preambles. Not those legal mumbo-jumbo kind of preambles, but something as simple as, “In my opinion…” This is to tell the reader that whatever is going to be said is purely your own opinion. It’s nothing personal.

Avoid Rules

What I’ve learned from PSA is to look at different aspects of photography when giving criticism and comments. And also avoid rules like the rule of thirds. Stay away from these rules of photography when giving comments, because they’re not prerequisites when making a photo. Nothing is ever fixed in the world of art. Why should it be? We would live in a world of zero creativity if everything was so rigid. So stay away from giving comments like, “It would be better if you had used the rule of thirds to compose this image.”
Oh yeah, and stay away from, “It would be better… ” and the super imposing, “If I were you…”
street photography
Photo by Adrian Cabrero; ISO 100, f/2, 1/2000 exposure.

What to Look for in a Photo

What are the aspects to look for? Here are some…
  • Creativity
  • Originality
  • Noise and/or Grain
  • Composition
  • Line
  • Eye Movement
  • Lighting
  • Focus, depth of field
  • Exposure
  • Dimension
  • Perspective
  • Tonal Range
  • Color
  • Impact
  • Balance
During the course, I was asked to comment on one of Henri Cartier-Bresson’s most revered images. I didn’t know this person or his work at that time. So I just gave my comments. Luckily for me, I started off the critique with, “I think… “, “In my opinion… “, and “To me… ” Only when my tutor told me that prints of the image are being sold at galleries for $ 10,000 each, and that it is okay to comment as long as it is our opinion, did I begin to reflect upon the fact that art is so subjective.
In essence, write your comments with the preamble, be nice with your words, and never be a jerk.
Another note in “courteous” critiquing would be to separate our good comments and suggestions. Try to put across all the good points first, then give your suggestions. Do not say something like, “I personally feel that the image is well done, but…”
It’s the BUT that is the pain in the BUTT.
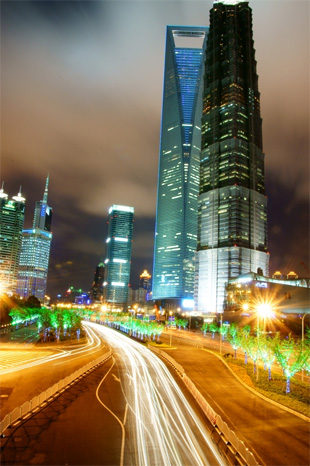
nighttime cityscape
Photo by Flickr user Roger; ISO 1600, f/4.5, 0.4-second exposure.
Say your suggestions separately, so that the image maker can keep all the positive comments and then learn from the critique.
And last but not least, although sometimes it’s better to keep quiet if what we are going to say could potentially offend someone, it’s also important to note that constructive criticism can teach us a thing or two about our own work. Most of the time saying what we already know reinforces our knowledge and can open doors to new knowledge. Do it with tact and humility.
Someone once said that we don’t live long enough to be anything but amateurs.
So when putting across what you think, say it like you know it, but make it sound like you know nothing.
Good luck!
About the Author:
Fauzi Anuar (http://www.zeeandmarina.com/) is a qualified master photographer (AMPA) specialising in portraiture, interiors and food.

Go to full article: The Importance of Constructive Feedback in Photography

What are your thoughts on this article? Join the discussion on Facebook

Article from: PictureCorrect

PictureCorrect


If you are interested in SLR Camera, check it out here for more details.

Tuesday, March 8, 2016

6 surefire ways to improve sharpness in your images

Sometimes, even when using effective image stabilisation or a tripod, images can still come out with a little less bite than expected.
Often it’s difficult to understand why this is the case when we believe we’ve done everything as we should, but the fact is that this could be down to a number of reasons, from issues with equipment and technique to the subject and even environmental factors.
Here are six tips make sure you always stand the best chance of capturing images with clearly defined details.
essential_camera_skills_1_shutter_speed 529f1f443fb54733b478c54e
1. Insure your shots with a minimum shutter speed
Many modern cameras allow you to set a minimum shutter speed, and this is an effective way to ensure images always stand a chance of being captured sharply – particularly when using lenses or cameras without any kind of image stabilisation.
When shooting in the Shutter Priority or Manual exposure modes you will probably already be using an appropriate shutter speed for your scene, although in the Aperture Priority mode it’s easy for shutter speeds to occasionally dip below what’s recommended for that particular focal length.
So how do you set this to the right speed? For general-purpose use, a good idea is to set this to the reciprocal of the focal length of your lens, taking into account any crop factor applied by your camera’s sensor.
So, a speed of 1/50sec would suit a 50mm lens used on a full-frame body, or alternatively 1/80sec or so if using a camera with an APS-C sensor.
If you’re using a camera with a particularly high-megapixel sensor (24MP or 36MP, for example), you may want to set this slightly higher to be on the safe side. On your camera this may be offered in same setting where you can adjust ISO (sensitivity) to an Auto option.
If your subject is moving, consider setting this to a speed that you know will render it sharply in relation to how fast or erratically it moves.
For posed images of people this does not need to be much higher than 1/100sec or so, although for those moving around a speed of 1/160sec or even 1/250sec would be more appropriate. Obviously in these situations you may also wish to employ continuous AF too.
2. Focus peaking
2. Know when not to use focus-and-recompose
The focus-and-recompose technique is a popular way of achieving focus in an image when, for whatever reason, there isn’t an AF point covering the subject.
What typically happens here that that the photographer will use the central or another key AF point to focus on the subject, before recomposing the shot to the desired composition. This usually works well with distant subjects but can cause softness with closer ones.
So why is this? Depth of field increases with subject distance, so when you’re focusing particularly closely to a subject, any shifts in subject or camera position after focus has been confirmed can leave the subject slightly out of focus.
This is particularly problematic with wider apertures where depth of field is shallow, so be aware of this if you do choose to employ this technique here.

How aperture affects depth of field: f/8
f/8
3. Don’t always use the widest aperture…
Wide-aperture lenses are great in low light and when trying to achieve very shallow depth of field, but most don’t give their optimum performance at their widest aperture. In fact, they tend produce sharper images when they are used at a smaller one, such as f/5.6 or f/8.
The main reason for this is because of an image-softening effect known as spherical aberration, which is particularly problematic at wide apertures.
It’s certainly the case that some optics are surprisingly sharp at the widest f-stop, but closing down the aperture – even slightly, thus maintaining the kind of shutter speed and effect you want in your image – can often help details be better defined.
Of course, that doesn’t mean you should always stay away from wide apertures. In fact, you may prefer a slight softness when shooting portraits or when images aren’t likely to be viewed at 100%, and the advantages of a having a very shallow depth of field may outweigh minor losses to sharpness.
Problem No. 5: Diffraction
4. … but don’t always use the smallest either
Although it’s possible to achieve expansive depth of field at very small apertures, push this too far and you may see sharpness compromised.
The reason for this is down to an effect known as diffraction, which concerns what happens with light as it passes around an obstacle of some kind, which in the case of lenses would be the aperture blades.
Most lenses can be stopped down to f/16 or f/22 but if can get the depth of field you need in an image at a slightly wider aperture such as f/11 or f/13, or if you use hyperfocal focusing, you may find this serves your images better.
Face Detection AF
5. Activate Face detection
When capturing people, one mistake many photographers make is focusing on the bridge between a person’s eyes rather than on the eyes themselves.
In some cases this isn’t too great an issue if the aperture is small enough to ensure depth of field renders both in focus, although when shooting close to the subject with a wide apertures – as you may well be doing with portraits – this can mean that the eyes are a little soft.
Obviously the best course of action is to always focus directly on the subject’s eyes, although when shooting multiple images in different compositions, it’s all too easy to slip on the occasional shot.
Activating Face Detection is a good way to ensure that the camera knows what it’s focusing on, and often these systems will try to ensure that the eyes are as sharp as possible.
p2_lower_essentials_3_tripod 33488c05e1e947e3a7b9304df634f4c6
6. Change your technique when using a tripod
Using a tripod can be an effective means of improving sharpness in your images, although even when using one it’s possible to compromise the result in many ways. The key thing to ensure is that the camera remains as static as possible during the exposure, which you can make sure of in a number of ways.
Using a remote release of some kind is a good way to ensure the camera is not touched at the point of exposure, although if you don’t have one, the self-timer option can be used successfully in its place.
Your camera may also have a mirror lock-up mode that allows the mirror to be raised independently of the shutter opening to capture the exposure (also a potential cause of blur), and you may be able to use this in conjunction with a remote release.
Make sure to turn off your image stabilisation system when using a tripod too, as this can create vibrations that work against the very thing the system is trying to prevent.
Your camera or lens may automatically sense then they are being used on a tripod and deactivate image stabilisation of their own accord, so check to see whether this is the case to save you the effort.


The post 6 surefire ways to improve sharpness in your images appeared first on Digital Camera World.


Lowepro Flipside 400 AW Black Camera Digital Camera DSLR Bag Backpack for Canon Nikon Sony

Lowepro Flipside 400 AW Black Camera Digital Camera DSLR Bag Backpack for Canon Nikon Sony


 Capacity:
1 pro DSLR with lens attached (300mm f/2.8) plus an additional body, 4-6 additional lenses, chargers and cords, filters, flash unit and 3 memory cards
Size(Interior): 
 10.6W X 5.9D X 16.7H in./27 X 15 X 42.5 cm
Size(Exterior): 
 11.9W X 10D X 18.1H in./30.3 X 25.3 X 46 cm
Outer fabric:
 600D Polyester, 600D Polyester Ripstop, and High Flow Mesh Nylon
Interior Fabric:
Velex, 210D Nylon, Tricot
Weight:
3.5lbs/1.6kg
Color:
Black 
Items including:
Flipside 400 AW Camera Bag Backpack  x 1 


Monday, March 7, 2016

8 reasons to shoot JPEGs over raw files

8 reasons to shoot JPEGs over raw files


Shooting in Raw is widely viewed as the better approach to shooting JPEGs for more serious, considered photography, but that does mean everyone should try to aim to competently abandon JPEGs? Not necessarily.
More and more photographers are citing many benefits of shooting JPEGs over Raw files, to the point that they will be happy enough to use these straight out of the camera.
It certainly makes sense when you consider that cameras are not only becoming more intelligent, but that they are also highly customisable to allow you to achieve the shot you want with less fuss.
Of course, Raw shooting has many advantages over JPEGs, and these are well known, but in the interests of balance here are a eight reasons why you may want to consider JPEGs.
Music photography tips: shoot raw + JPEG
1.    Smaller files bring many benefits
Although the file size of an image partly depends partly on the subjects within it, Raw images tend to be significantly larger in size than JPEG files. This could be as little as two or three times the size, or potentially even six or seven – and this has many drawbacks.
Your cards filling up faster will be the most immediate disadvantage, and it will also usually take longer to get these images flushed out to your memory card. The need for more, or larger, hard drives means it will ultimately cost you more to store all this information, too.
Shooting sports: JPEG images or raw format - which should you use? Free photography cheat sheet
2. Greater burst depth
Shoot sports or any other action photography? Your camera’s buffer will fill up faster if you capture either Raw or Raw and JPEG images, and this may well slow you down when shooting a burst of images.
Switching to the JPEG option will allow you to shoot for a longer burst, and some cameras claim to allow this up to the capacity of the memory card used. Just make sure your memory card is fast enough to cope with a large stream of images, as this could be a bottleneck you don’t need.
SEE MORE: What is a raw file? We explain the pros and cons
How to apply lens distortion correction in-camera: step 2
3. Instant lens corrections
One of the lesser-mentioned benefits of digital capture over film is that the camera can automatically process out a number of minor lens corrections, such as vignetting, distortion and chromatic aberration.
If you began shooting on film where this wasn’t possible, you may already appreciate how useful and time-saving it is to have this happen without you even thinking about it, particularly if you’re used to using wide-angle or wide-aperture lenses where distortion and vignetting respectively can be problematic.
Of course, it is possible to apply these to Raw files using software, although for everyday images that aren’t likely to be processed, the convenience of instant lens corrections makes a lot of sense.
4. Disciplines you to make it right in camera
Just as shooting on film disciplines you into trying to get the result you want in camera, so can the knowledge that you don’t have a Raw file to fall back on when shooting a JPEG.
Disciplining yourself in this way means you’re more likely to adjust the relevant processing parameters to your liking and make more effort to get it right if you review your images and find something isn’t quite right.
If you’re used to shooting Raw images you may not be aware of just how much is possible in camera.
From checking focus with the zooming controls and using highlight warnings to guide you with exposure, to finely adjusting sharpening settings to suit your specific subject, you may find your camera is more capable that you think.
5. In-camera processing is often good enough
While you may be able to get great results with time and care in post-production, it’s entirely possible that your camera would do just as good a job – and in an instant.
Today’s cameras are sophisticated enough to instantly process out defective pixels, reduce noise only in specific areas of the scene and lift shadowy areas to better balance exposures, so it makes sense to take advantage of these time-saving measures.
The typical camera will offer many colour preset options and the majority of models allow you to either tweak the individual parameters of these or create brand new presets ones should none suit your taste.
Taking a little time to define a few styles that suit your shots will mean that you not only save yourself processing time later, but it will also mean you can either preview your effects as you shoot or at least be able to see this immediately after image capture.
Photoshop_Elements_workflow_photo_editing_CAN59.tut_workflow.step4
6. You’re unlikely to process every image
Sure, it’s a good idea to stick to Raw when it matters, but for casual snapshots is it always necessary? Not only will you not process every image you take but you’re unlikely to view them all at the kinds of sizes where small differences in sharpness and noise reduction make much difference.
Many modern cameras have at least one button which can quickly be used to activate Raw recording, meaning that you can shoot in JPEGs for everyday shots and quickly switch to Raw (or Raw and JPEG) for the images that matter, so check if this is possible on your model.
7. Instant compatibility and use
As soon as you capture a JPEG, it’s ready for use and supported by a wide range of devices. If you need to quickly send it to someone or upload it to a social networking site, or alternatively print it out, copy it or simply view it on a computer or another display, you can do so.
Raw files, by contrast, need specific software programs that have been updated to support that particular camera. Files from particularly new models may not even be supported by your editing program of choice, meaning that you need to wait for an update from the manufacturer before editing it here.
8. Time
The gift of time is one of the greatest advantages of shooting JPEGs. No additional processing of Raw files means you have more time to yourself and you won’t have too wait as long to download, sort through and store all of your images.

Source: http://www.digitalcameraworld.com/2016/03/03/8-reasons-to-shoot-jpegs-over-raw-files/


Canon EF 75-300mm F/4-5.6 III Telephoto Zoom Lens

Canon EF 75-300mm F/4-5.6 III Telephoto Zoom Lens


Canon EF 75-300mm F/4-5.6 III Telephoto Zoom Lens is the lightest 4x telephoto zoom lens in its class. Ideal for sports, portraiture, animals, etc. The telephoto effect can make the picture look comp

More details here.

Sunday, March 6, 2016

Weekly Photography Challenge - Hands

Hands can be just as expressive as the face sometimes, as these images show.

Weekly Photography Challenge – Hands


Elisabetta Orlacchio
By Elisabetta Orlacchio
This week it’s your turn to photograph hands. Human or otherwise – it’s your choice. Find some expressive ones and use good lighting, and compositional techniques to create some great images.
Bill Gracey
By Bill Gracey
Lucio Zandonati
By lucio zandonati
Johnson D
By Johnson d
Jessie Jacobson
By Jessie Jacobson
Giovanni
By Giovanni
Romanlily
By romanlily
Sharada Prasad CS
By Sharada Prasad CS

Share your images below:

Simply upload your shot into the comment field (look for the little camera icon in the Disqus comments section) and they’ll get embedded for us all to see or if you’d prefer upload them to your favourite photo sharing site and leave the link to them. Show me your best images in this week’s challenge. Sometimes it takes a while for an image to appear so be patient and try not to post the same image twice.
 
 
The post Weekly Photography Challenge – Hands by Darlene Hildebrandt appeared first on Digital Photography School.

Digital Photography School

If you are interested in SLR Camera, check it out here for more details.

Nikon 14-24mm f/2.8G ED AF-S Nikkor Wide Angle Zoom Lens

Nikon 14-24mm f/2.8G ED AF-S Nikkor Wide Angle Zoom Lens
Item specifics
Condition:
New: A brand-new, unused, unopened, undamaged item in its original packaging (where packaging is ... Read moreabout the condition
Brand:

Nikon

Type:High Quality, Ultra wide angle, Image StabilizationFocus Type:Auto & Manual
Compatible Brand:For NikonCamera Type:Digital SLR, SLR
Camera Technology:Digital, FilmFocal Length:14-24mm
Maximum Aperture:F/2.8Focal Length Type:Zoom
Mount:Nikon FUPC:018208021635
Detailed item info
 
Product Information
The Nikon Zoom-Nikkor AF-S VR IF ED G Lens is 3.9-inches in diameter and 5.2-inches long, and it weighs in at just 35.3 oz, making it easy to carry along on a shoot. A maximum aperture of f/2.8 and a minimum aperture of f/22 allow this Nikon camera lens to provide clear image in all types of lighting. This Nikon camera lens also takes clear close up pictures, as it can focus on an object just 0.9 ft away from it. The Nikon Zoom-Nikkor AF-S VR IF ED G Lens features automatic focusing, so even an amateur can enjoy taking great pictures with it. For an experienced photographer this wide-angle camera lens also has a manual focusing mode. When using focusing thus wide-angle camera lens, there is little noise, thanks to its silent wave motor. A good lens is a photographer’s number two tool, second only to the camera, and the Nikon Zoom-Nikkor AF-S VR IF ED G Lens is one that won’t disappoint.
Product Highlights
Video 
 
Product Identifiers
UPC018208021635
 
Lens System
TypeHigh Quality, Image Stabilization, Ultra wide angle
Focus TypeAuto & Manual
Focal LengthZoom
Focal Length (mm)14-24mm
ApertureF/2.8
Min Aperture22
 
Compatibility
Compatible BrandNikon
Camera TechnologyDigital, Film
 
Dimensions
Diameter3.9 inch
Weight34.22 oz

Nikon 14-24mm f/2.8G ED AF-S Nikkor Wide Angle Zoom Lens AF-S Nikkor 14-24mm f/2.8G ED lens 21-36mm Effective Focal Length with APS-C Sensor Cameras Ideal for Wide-angle Shots of Landscapes and Scenery Lens
Construction: 14 Elements in 11 groups Contains Two ED (extra-low dispersion) Lens Elements for High Resolution and Contrast Nikon AF-S Zoom Nikkor 14-24mm f/2.8G ED AF Lens Dedicated Front Cap (#4920) Rear Cap Lens Hood CL-M3 Semi-Soft Case Strap for Case hhh ddd jjj ooo --> -->
An optical masterpiece: the ultimate ultra-wide-angle zoom. With a fast fixed maximum aperture of f/2.8, the award-winning AF-S NIKKOR 14–24mm f/2.8G ED delivers truly superlative performance in any situation. Nikon’s exclusive lens technologies and innovations in optical design deliver outstanding sharpness, color and contrast, even in backlit conditions. Tough, reliable, simply exceptional—this is essential glass for serious photographers who demand the best photos and HD videos.


How to Use Bulb Mode on a Camera

How to Use Bulb Mode on a Camera

There is a special setting on all DSLR cameras that allows the photographer to go beyond the longest automatic shutter speed setting of 30 seconds. In fact, this special setting allows infinitely longs exposures to be made. This is the Bulb setting, or Bulb exposure mode.

camera bulb mode

“Busy Street” captured by Boyet Abergos (Click Image to See More From Boyet Abergos)

The shutter speed range on a DSLR camera finishes at 30 seconds. One click below that selection is Bulb, which allows the photographer to manually hold the shutter open for as long as is required as the shutter button is pressed down. The camera bulb exposure setting is only available in Manual mode.

The Bulb mode is basically a creative feature. It allows shots to be taken that are minutes long, rather than seconds. A typical image to capture using this feature is one of star trails when the night sky is clear. Simply aim the camera to the north or south celestial pole, depending on which hemisphere you live.

Another common image to capture is of the trails of vehicle lights when it is dark. These moving lights will create artistic streaks of white and red patterns emitted from the head lights and tail lights of passing traffic. If you are near a traffic junction you may capture orange streaks from indicator lights. And if you’re lucky enough, you may get a streak of blue from the flashing light of an emergency vehicle.

Here then are the three things you must do in order to shoot in Bulb mode, in other words, with the camera’s shutter open:

  • Use a Tripod: Attach the camera to a tripod in order to ensure that no camera movement will ruin the shot. You don’t have to use a tripod so long as the camera is on a solid base, like a wall. Turn off the any anti-shake mechanisms you may might have on your camera or on the lens.
  • Use a Remote Shutter Release: A remote shutter release will prevent vibrations ruining the shot as you press the shutter button. No matter how careful you are, you will always cause a tiny bit of vibration as you depress the shutter button. That doesn’t matter with fast shutter speeds, but in Bulb mode you will record vibrations, however small. If you don’t have a remote cable, use the camera’s built-in self-timer delay, which is just as effective. A two second delay will be adequate.
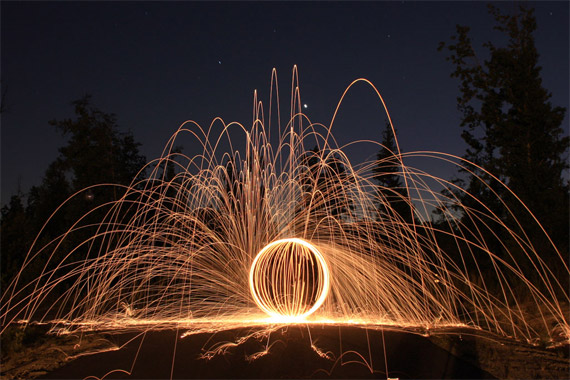
long exposure bulb mode

“Steel Wool Orb” captured by Johnny Dickerson (Click Image to See More From Johnny Dickerson)

Switch to Manual Mode: Since metering is completely irrelevant when using the Bulb exposure setting, switch the camera to its Manual mode. Next, choose an appropriate aperture, like f/8 or f/11, as these apertures offer the best image quality. Also, set the ISO to 100 or 200 in order to minimize sensor noise. Finally, experiment by taking several test shots before capturing the final long exposure bulb mode image.

About the Author
Chris Smith is a photography expert and writer for an online magazine.


Go to full article: How to Use Bulb Mode on a Camera

What are your thoughts on this article? Join the discussion on Facebook or Google+

Article from: PictureCorrect

Source: Picture Correct http://ht.ly/YLUZW More about watches? Visit here.

Find more about digital camera, click here.

Saturday, March 5, 2016

WiFi Extreme Go Action Camera Full HD 1080P 30M Waterproof Pro Camera Underwater Sports DV Mini Camera with IR Remote Control

Screen Size:
1.5 Inch
High Definition Support:
1080P (Full-HD)
Brand Name:
Ckeyin
Package:
Yes
Memory Card Type:
MicroSD / TF
Launch Date:
2015
Optical Zoom:
Fixed Focus
Built-in Memory Size:
Non
Sensor Technology:
CMOS
Image Stabilization:
Electronic Image Stabilization
Touch Screen:
No
Pixels:
2-3 million
NightShot Function:
Yes
Sensor Type:
CMOS
Model Number:
DVR36
is_customized:
Yes
Type:
Portable
Unit Type:
piece
Package Weight:
0.700kg (1.54lb.)
Package Size:
18cm x 10cm x 5cm (7.09in x 3.94in x 1.97in)
Calculate your shipping cost by country/region and quantity.
Quantity:
Ship to:
Unit Type:
piece
Package Weight:
0.700kg (1.54lb.)
Package Size:
18cm x 10cm x 5cm (7.09in x 3.94in x 1.97in)
Our Buyer Protection ONLY protects Payment Methods on AliExpress as below:
  • Bank Transfer
  • QIWI
  • webmoney
  • Boleto
  • Yandex
  • Doku

From This Seller

From Other Sellers

http://ht.ly/YLUZW More about watches? Visit here.

Shutterbug Photo of the Day: "Bearded Dragon" by Lorenzo Cassina

Friday, March 4, 2016

5 Things You Can Change to Take Better Pictures

5 Things You Can Change to Take Better Pictures

“Photographic skills needed!” Or, “photography classes.” These are the search terms many of us need to enter into our favorite search engine so that we can figure out how to take better pictures.

Actually, there’s no shortage of great photographers, but not everyone that totes a digital camera is necessarily a creative genius, nor are they all products of photography classes. That being said, there are some things you can do to improve your photographic skills and abilities.

things to change to be a better photographer

“zeh photographah” captured by Brian Goldfain

Here is a list of 5 things you can change to improve your pictures.

1. Change your camera

Buy a new camera? Maybe, maybe not. There are so many terrible images that are a result of three things: a poor camera, the wrong camera for the type of shot, and bad technique when shooting.

Poor cameras. If you do everything necessary to get a good shot, but it still comes out poorly, it may be time to upgrade.

The wrong camera. Not every camera is capable of taking certain shots. For instance, getting good pictures of a NASCAR race may not be possible with a point and shoot camera. The same is true of other specialty types of photographs, such as macro and wildlife photos. If you really want to take those kinds of pictures, it may be time for an upgrade.

Bad technique. Many camera users are guilty of this. In fact, you should definitely try to “fix” this before abandoning your camera for a new model. The one most common problem comes from the way the shutter button is pressed. There is a right way and a wrong way. To get the best results, push the shutter button down part way and allow the camera to focus, then take the shot by simply pressing it the rest of the way. DO NOT jam your finger down on the button. This will result in a blurred picture most of the time.

2. Change the number

Simply said, take more pictures. Do not rely on the first shot if you can take another. Sometimes this is not possible, like when the subject is your child and she has moved on to the next cute pose. Even if you check the viewfinder to see what the picture you took looks like, take more. You might be in for a big surprise when you transfer your shots to the computer and find that the picture is too blurry or there was an uninvited participant walking into the frame of the photo (and you didn’t notice him when you previewed the shot in the viewfinder). Lots of things can be wrong with a picture. The more photos you take, the more opportunities there are for getting a great shot.

3. Change the mode selection button

Take a walk on the wild side and take the camera off Auto. Sound a little extreme? As long as you take your pictures using the same camera settings, you will keep getting the same kind of shots you have been getting. Try a couple of different things to see the results. For instance, it’s easy to switch to one of the basic modes like “cloudy” or “sports.” This is YOU taking charge of your camera settings one small step at a time. Switch off the automatic flash, and you will see some immediate improvement in some pictures. Experiment with the settings when you have the time and if the photo is not a critical one. By all means, read the manual to see exactly what you can change on your camera to get different results.

4. Change the composition

Great photographers spend time analyzing shots. They do not usually take out their point and shoot camera and start snapping. You can do the same. Think through what you want to accomplish with your shot. Have you heard about the “rule of thirds?” This just suggests that you don’t make your subject the center of every shot. Move the camera frame up, down, or sideways to get a different composition. This one little trick will add interest and drama to many otherwise boring shots.

rule of thirds

“Black Mountains near Abergavenny” captured by Les Haines

Also decide how much of the subject you want in the picture. Sometimes purposely getting more or less of the subject can add interest. Again, taking more pictures is a good strategy as you experiment with composition.

5. Change your position

Get mobile! Move closer, move farther away. Move to one side or another. Change your perspective by moving your camera above or below where you would normally shoot.

You can get better pictures by just paying attention to these five tips.

About the Author:
Wayne Rasku is an amateur photographer. You can find him at digital-photographic-resources.com with more info about DSLR cameras and portrait lenses.


Go to full article: 5 Things You Can Change to Take Better Pictures

What are your thoughts on this article? Join the discussion on Facebook or Google+

Article from: PictureCorrect

Source: Picture Correct http://ht.ly/YLUZW More about watches? Visit here.

Tamron SP 35mm & 45mm f/1.8 Di VC USD review

At last, it's prime time for Tamron as the lensmaker enters the fray with a brand new pair of fast, up-market lenses. Find out how they perform in our Tamron SP 35mm and 45mm f/1.8 review.

The post Tamron SP 35mm & 45mm f/1.8 Di VC USD review appeared first on Digital Camera World.

http://ht.ly/YLUZW More about watches? Visit here.

Triopo TR-586EX C Wireless Flash Mode TTL Speedlite Speedlight For Canon 5D3 7D 60 DSLR Camera as+TF-361for Canon Flash Trigger

Thursday, March 3, 2016

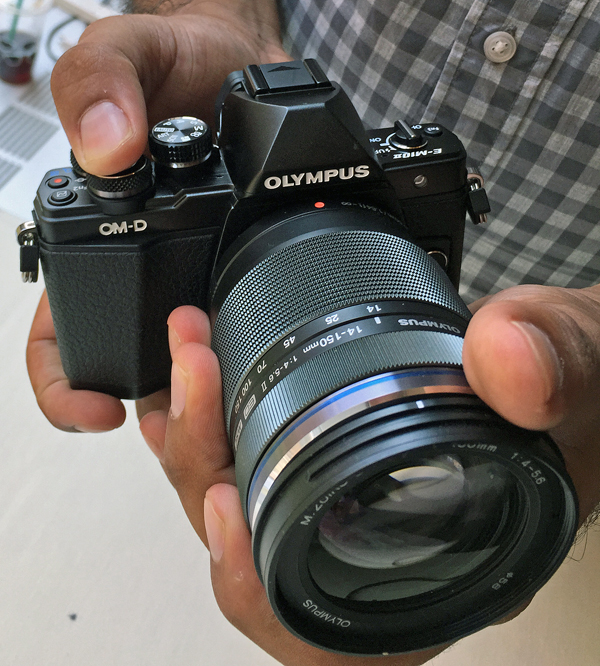
Olympus Unveils Small, Retro-Styled OM-D E-M10 Mark II Mirrorless Camera (Hands-On Photos)

Olympus Unveils Small, Retro-Styled OM-D E-M10 Mark II Mirrorless Camera (Hands-On Photos)
Show Promo Image

Olympus took the wraps off a new entry-level mirrorless camera this morning: the small and retro-styled Olympus OM-D E-M10 Mark II. Like several of Olympus' models in its mirrorless camera lineup, the E-M10 Mark II uses a 16-megapixel Live MOS sensor in the Micro Four Thirds Format.

Tue, 08/25/2015
Source: Photography -Shutterbug http://ht.ly/YLUZW More about watches? Visit here.