Wednesday, March 23, 2016

MediaTek launches Imagiq ISP for dual cameras

Smartphones bearing dual cameras are on the rise, and MediaTek’s new Imagiq image signal processor is prepared to take advantage of them. Read more

Articles: Digital Photography Review (dpreview.com)

If you are interested in Photography, check it out here for more details.


from SLR Camera http://ift.tt/22F8rju

Avoiding Duplicate File Names

Your earliest photographic habits naturally will build over time, including the ways that you name and organize your images. What seems like a small issue at first – say, keeping your camera’s default file names – could spiral out of control when you have tens of thousands of images. It can be easy to delete photographs on accident when they have the same file name, potentially deleting some of your favorite photos. Although a good backup system helps you recover a photo that has been lost, it is far better to prevent such a mistake from happening in the first place. While there is no perfect naming system, I will cover some useful tips that help you avoid duplicating the file names of your own photographs.

1) Default File Names

By default, most cameras will name their photographs in the format “DSC_1234” or “_DSC1234,” with the numbers incrementing from 0001 to 9999. At that point, the counter resets. With your ten-thousandth photograph, your file names will start to repeat.

2) Why Avoid Duplicates?

If you do have photos with the same name on your computer, it isn’t the end of the world. Assuming that the photos are located in different folders, they won’t overwrite any data. The danger comes when you put two photographs with the same title into the same folder. Then, a warning will pop up:

Rename-Photos-Lightroom-3

If you accidentally click the “Replace” command that appears, you will lose the old file completely. This isn’t something that you can necessarily undo; once a photo has been overwritten, it may be gone for good. (You can try right-clicking on the photograph outside of Lightroom, then clicking “Previous Versions.” However, this does not always work – particularly if it takes you a few weeks or months to realize that you even replaced the file in the first place.) At this point, if you don’t have a good backup system, you might have lost the image for good.

3) Batch Renaming

If you already have duplicate file names on your computer, you need to rename all of your old photos. Luckily, this is easy to do as a batch. Almost all post-processing software, like Lightroom or Capture One, lets you rename multiple images at the same time. I will focus on Lightroom below, but these suggestions should work for most any workflow.

The first step is to highlight every single photograph that you want to rename. To do this, go to the parent folder that holds all of your photos.

If you don’t see a parent folder with all your photos, right-click on the uppermost folder that you do see. Then, click “Show Parent Folder,” as shown below. Also, be sure that you have enabled “Show Photos in Subfolders,” which is under the “Library” menu option in Lightroom.

Rename-Photos-Lightroom-1

Now that you have found the parent folder, highlight every photo in your library (control+a for Windows, or command+a for Mac). At this point, you may have tens of thousands of photographs selected. Now, you just need to rename them. In Lightroom, this option is under Library>Rename Photos; in Capture One, it is under File>Batch Rename.

The next step is to choose the title you want to give your images. I format mine as CUSTOMNAME-1, where “1” represents a sequence, but feel free to choose whatever name makes the most sense to you.

Rename-Photos-Lightroom-4

4) Keeping Your Custom Titles

The steps above work well to rename your old photos, but there is one major problem: you will overwrite the titles for photos that already have custom titles. If I have a photo named “Milky Way Reflection,” I don’t want to replace it with a generic CUSTOMNAME-00001 title. The only photos I want to rename are the default, “DSC_1234” photos that I haven’t already given a name.

Luckily, this also is easy to correct: simply sort your photos by the text “DSC,” then highlight every image. Now, you have filtered out all the photographs with custom titles!

To search for “DSC” photos in Lightroom, click “Text” in the Library module’s filter bar. Other software has similar sorting tools, and there is no point in covering every one; simply search online if this is new to you. Again, you should be in the parent folder.

Rename-Photos-Lightroom-2

5) Naming Photos Upon Import

Once you have renamed all your old images, it’s time to make your system future-proof. This is simple; all you need to do is rename every photo as it loads onto your computer. Almost all photography software lets you to do this automatically – even the free software that is bundled with many cameras.

Your goal here is to create an automatic file name that is unrepeatable; you never want to have a duplicate. Personally, I use a naming system with the following form:

YYYY-MM-DD-Hour-Minute-Original Filename

Although it is a bit long, this file name does not repeat. And, all the better, I can set this format with Lightroom’s custom naming tool; I never need to type any information myself. A sample photograph of mine might be:

2015-12-31-23-59-DSC_1234

This represents December 31, 2015, at 11:59pm.

Assuming that I don’t shoot 167 photographs per second, this system won’t duplicate any names for thousands of years! At the same time, it is descriptive; a quick glance tells me exactly when I took each image.

6) Using Multiple Cameras

There is one remaining issue with a name like this: if I take photographs with multiple cameras, it still is possible – if unlikely – to have duplicate file names. To get around this issue, I replace the “DSC” standard on each of my cameras with a different combination of letters. This is done in the camera’s menu itself.

For my primary camera, my photos become SKY_1234. For my secondary camera, my photos are OAK_1234. It is simple to change this option on almost all modern cameras; I recommend that you consult your manual if you don’t know how to do so.

7) Conclusions

Is this system overkill? Perhaps it is. But I personally have lost some of my photographs from duplicating file names, then mindlessly clicking “Replace” when my computer runs into an error. Now, I never have to worry about this again. For any photographer shooting digitally, it is crucial that your photographs have unique file names; otherwise, you may lose some of your favorite shots.

The post Avoiding Duplicate File Names appeared first on Photography Life.

Photography Life

If you are interested in Camera Tips, visit here.


from SLR Camera http://ift.tt/25mhyIp

Food Photography: From Snapshots to Great Shots (Book Review)

While Nasim is busy traveling, I am going to try to fill in for a few days and post some articles. Although there are a number of reasons why I have not been writing for PL for a while now, one of the main reasons has been simply lack of time! I hope our readers can forgive me for that, but going forward, I will do my best to show up a bit more often, since we need more female content here :) Anyway, since I get a lot of questions and requests from our readers regarding food photography (many of whom are novice photographers and food bloggers), I decided to do a quick review of Nicole S. Young’s book titled “Food Photography: From Snapshots to Great Shots” that I bought a few years back for my own personal use.


From Snapshots to Great Shots

NIKON D750 @ 50mm, ISO 100, 1/60, f/1.8

Note: Since my purchase, Nicole has already published a Second Edition of the book, with more up to date information. So if you are planning to buy this book, I would recommend to get the latest and greatest version.

When I started learning about food photography (see my food blog with a list of recipes), there weren’t many books to learn from. With little to no budget, I mostly acquired knowledge from random food bloggers and relied on my technical background as a wedding and portrait photographer. Learning a new craft can be a long and painful process, but if you are patient and persistent enough to stay on track, you will eventually succeed. Unless you have a big budget to hire a professional food photographer who can teach you their craft in a jiffy (not happening), you will most likely be scrambling for information from various sources to build yourself up. The good news is, you don’t really need to worry about that anymore, since quite a few photographers and food stylists have already done the hard work by creating excellent material to aid others in the learning process.

Food Photography, From Snapshots to Great Shots (1)

NIKON D750 @ 50mm, ISO 100, 1/50, f/1.8

In my humble opinion, “Food Photography: From Snapshots to Great Shots” by Nicole S. Young is one of such materials. While it might seem a little easy or lacking for seasoned food photographers, it is a great place to start for those wanting to learn the basics of food photography. So to clarify, this book is geared towards more of an entry-level food photographer or a food blogger, who is looking to solidify their core technical and inspirational base. This book is for photographers who are also their own food stylist. If you’ve been photographing food for years and looking into “spicing things up” and taking your skills to the next level, this book is NOT for you. Many negative reviews of this book come from people who have a solid footing in photography, which in my opinion, is not really fair, considering the intention of the writer to begin with.

Every teacher has a different style of teaching and every teacher chooses their tools according to their curriculum and beliefs. While my technical approach is a little different than Mrs. Young’s and I use different photographic gear than her, the principles outlined in this book are true to what she has to offer. Mrs. Nicole starts with a basic introduction of correlation between Aperture, Shutter Speed and ISO. She talks about the importance of choosing the correct while balance, the differences between RAW and JPEG, etc. She chooses to use Adobe Photoshop for post-processing work and she takes you through the steps she uses to achieve her final results (if you don’t use Adobe Photoshop, you can still benefit from using similar steps in other photo editing platforms).

Food Photography, From Snapshots to Great Shots (3)

NIKON D750 @ 50mm, ISO 100, 1/40, f/1.8

Her next chapter is dedicated to choosing camera equipment and accessories for food photography. She explains what gear she uses and why. Mrs. Young also gives a good amount of general information about lenses, focal lengths and their use. These recommendations can be used across the board for different camera brands.

Next, she goes into lighting the subject, which in this case is food. There is only one case scenario, shooting back-lit and making that scenario work really well. While there many other options of lighting food, Mrs. Young chose to showcase back-lit food photography the most. She also talks about lighting modifiers and accessories one might need to use to get the shot. These accessories can be used in different case scenarios, regardless if you are shooting back-lit or not.

As a food photographer, I do not have access to a fancy food stylist. So, I end up styling my food according to my own taste and according to my best knowledge. Mrs. Young dedicated a chapter to this concept and gave pointers on how to make food look more appealing by using simple tools, without making it look plastic and inedible. I really wished this part of the book was bigger and had more content going its way. While learning photography itself is half the challenge, styling food and having a good eye for design is not something that everyone can do or master. However, it can be taught and can be improved. For the slot allocated for food styling though, Mrs. Young gives sensible tips on how to use professional tricks like “sit-ins”, correct framing, and usage of live view to make sure the end result of your food looks much better than before you started reading this book.

Food Photography, From Snapshots to Great Shots (2)

NIKON D750 @ 50mm, ISO 100, 1/80, f/1.8

Overall, I found “Food Photography: From Snapshots to Great Shots” to be informative and well-written. It is pretty straightforward, easy to understand and has a quite a fair amount of beneficial information to jump-start your food photography. While the book could have been expanded to cover many more topics, it would have potentially made it overly complicated for beginners, which might not have been the original intent of the author. In my view, it is a finished product for its intended purpose and it could serve as a preparation step for other tutorials to come from Mrs. Young in the future.

The post Food Photography: From Snapshots to Great Shots (Book Review) appeared first on Photography Life.

Photography Life


Read more on photography here.


from SLR Camera http://ift.tt/1Rk524J

Sony FE 90mm f/2.8 Macro G OSS review

Sony FE 90mm f/2.8 Macro G OSS review

Released too late for our major group test of macro lenses in issue 171, Sony’s new offering is now present, and looks very much correct.

It’s a full-frame format E-mount optic that’s ideally suited to the Alpha 7 series of camera bodies, further extending the appeal of Sony’s Alpha E-mount system.

A prime lens in every way, it boasts excellent build quality and a host of high-end features, along with a short telephoto focal length and full 1.0x or 1:1 magnification at its shortest focus setting.

Build & handling
The quality glass includes aspherical, ED and Super ED elements, plus Nano AR coating. There are 15 elements in all, arranged in 11 groups.

Further highlights include DDSSM (Direct Drive Super Sonic-wave Motor) autofocus; an OSS (Optical SteadyShot) stabiliser; a three-position autofocus limiter switch that includes full-, short- and long-range settings; a focus hold button on the side of the lens barrel; and a well-rounded nine-blade diaphragm.

There’s no full-time manual override of autofocus as such. Instead, you can switch between autofocus and manual focus by nudging the focus ring forwards or backwards.

The manual focus ring has a fairly long travel and operates very smoothly, enabling precise adjustments. One downside of the system, however, is that the focus distance scale is inactive during autofocus.

Performance
Autofocus is fairly fast, near-silent and, coupled with an A7-series camera, extremely accurate. Sharpness and contrast are very good, even at the widest available aperture of f/2.8, which enables a tight depth of field for portraiture and other short telephoto shots.

As with competing stabilised macro lenses, the effectiveness of the stabiliser is greatly reduced at very short focus distances.

Lab Results

Screen Shot 2016-03-07 at 10.53.13 AM

Specifications

Full-frame compatible
Yes

Focal length
90mm full-frame; 
135mm APS-C

Image stabiliser
Yes

Min focus distance
0.28m

Max magnification factor
1.0x

Manual focus override
Push-pull focus ring

Focus limit switches
Yes

Internal zoom/focus
N/A / Yes

Filter size
62mm

Iris blades
9 (rounded)

Weather seals
Yes

Accessories
Lens caps, hood

Dimensions (D x L)
79 x 131mm

Weight
602g

Price
£900/$ 1,100

Verdict

The Sony is equally adept as a close-up macro lens and a short telephoto with attractive bokeh, but UK pricing is high.

Features: 4.5/5
Build & Handling: 4.5/5
Performance: 4.5/5
Value: 3.5/5

Overall: 4.5/5

READ MORE

Sony lenses explained: which lenses to use on which cameras
Canon EOS 5D Mark III vs Sony A7 II
Sony A7S II vs A7 II vs A7R II: which should you buy?

The post Sony FE 90mm f/2.8 Macro G OSS review appeared first on Digital Camera World.

Digital Camera World » Reviews

More info on Photography, here.


from SLR Camera http://ift.tt/1Rz3OWv

Sunday, March 20, 2016

Colored Dyes for Sale in Kochi, India

Colored Dyes for Sale in Kochi, India

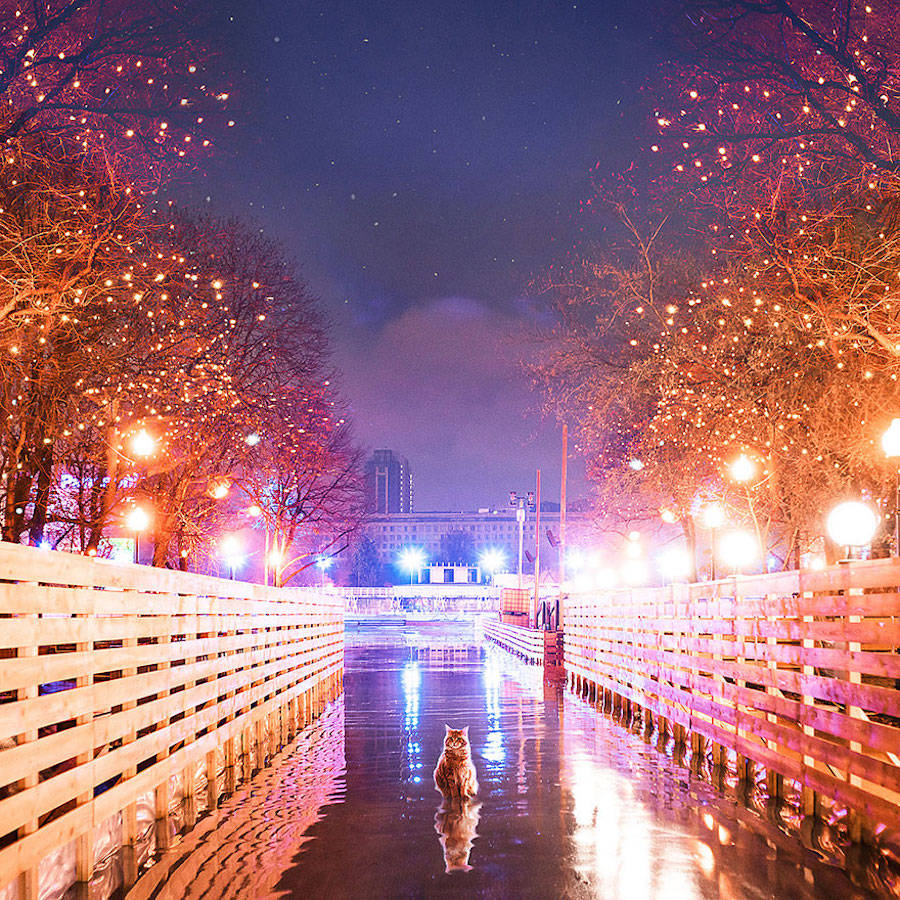
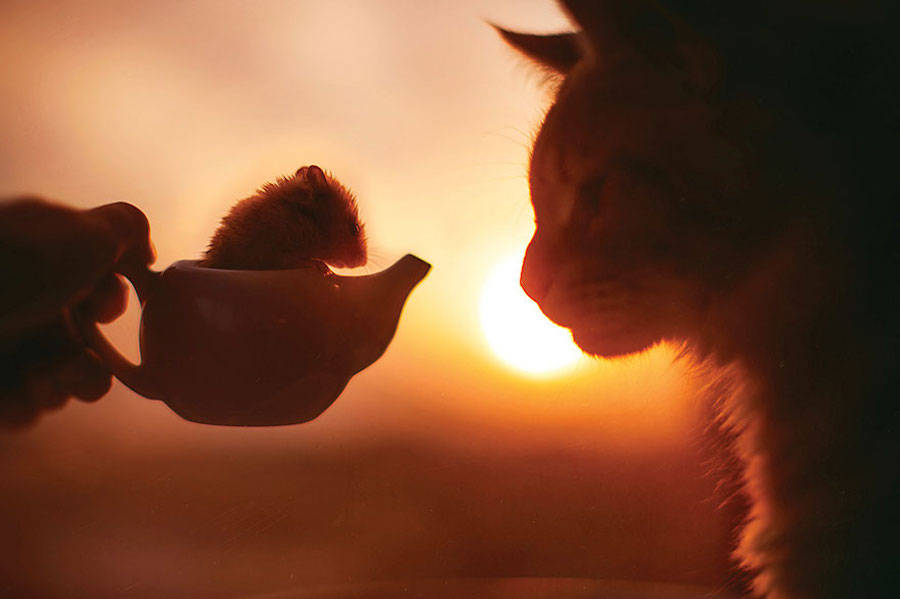
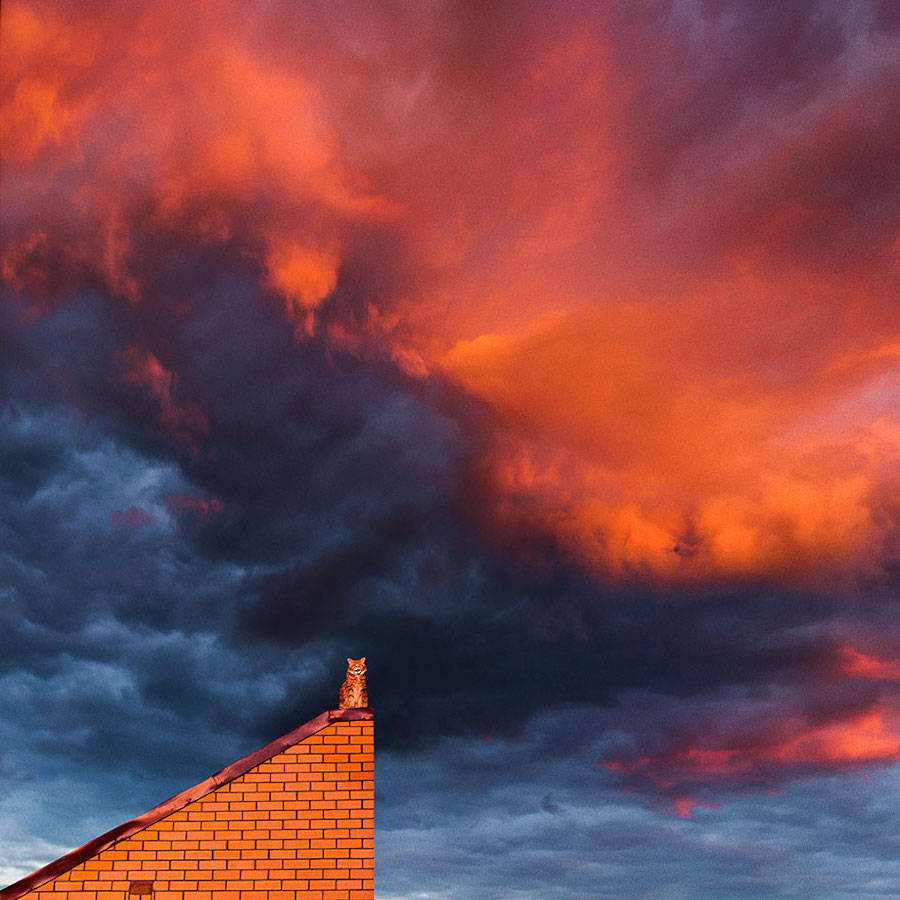
Majestic Photography of Ginger Cat

Majestic Photography of Ginger Cat

Russian photographer Kristina Makeeva has a lot of talent to magnify and capture different landscapes, but she manages to stage especially with his genius and humor her cat named Kotleta. The animal with ginger fur is immortalized here from various angles, with other companions or in tender situations, touching or hilarious. Photographs highlighted in the Instagram account of the artist.


Source via:  Majestic Photography of Ginger Cat 


Wednesday, March 16, 2016

How to set up a tripod the right way

Image stabilisation features in lenses and improved high ISO performance in cameras, have transformed the possibilities of taking pictures in low light, but the steady base of a tripod is your best choice when it comes to exploring the creative possibilities of slow shutter speeds and low light. Below we’ll show you some quick tips for how to use a tripod effectively, as well as some essential features you’ll want when choosing the best tripod for your needs.

Unless you’re using a tripod indoors, the chances are that the ground will be uneven, so you need to get used to setting up your tripod on every type of surface (check out our 4 tips for getting sharper pictures when using a tripod).
The most common situation is when the ground isn’t level, so you need to adjust the legs to accommodate this. You can adjust the length of each leg to suit the height of the ground, or you can change the angle of each leg.
For low-level shots you need to unscrew part of the centre column, allowing you to get down to around 30cm from the ground.

Alternatively, you could either reverse the centre column or remove the head and attach it to the bottom of the column. This enables the camera to be positioned at almost ground level, but the camera will be upside down, making it more difficult to operate easily.

Most budget tripods are quite light, so you‘ll find that adding extra weight will help to make them more stable, especially in windy conditions. Some models have a hook on the end of the centre column to which you can attach your camera bag. In the absence of a hook you can hook the handle of your bag over the top of the tripod.
Set up your tripod using the steps below and you’ll get sharp results.

How to use a tripod: an incorrect correct set-up
The wong way to set up a tripod.
Step 1: Use the top sections
Extend the largest section legs first. The smaller sections at the bottom of the legs are less rigid than the thicker top sections, and so are more prone to wobble and flex.
Step 2: Keep the column low
Avoid raising the centre column. This is the most unstable component of affordable tripods, so avoid using it if you can, especially in windy weather.
How to use a tripod: a correct set-up
The right way to set up a tripod
Step 3: Check the footing
Make sure the feet are on stable ground. On slippery surfaces such as wet rock or loose gravel, try to wedge the feet in position, especially if you’re shooting down low.

Features to look for in a tripod

Look for solid construction when buying a tripod
Solid construction
Look for the best aluminium construction you can find. Extend the tripod up to its full height and gently press down on the top of the tripod to see how much movement there is. A budget model won’t be static, but it shouldn’t move much.
Make sure you tripod has effective leg locks
Effective leg locks
Make sure the leg locks are easy to open and close, and that they hold their positions. Try extending the legs, then gently press down on them to make sure they don’t
compress easily.
Make sure your tripod is versatile
Versatility
Make sure the tripod allows you to shoot at low levels by having adjustable leg angles. The ability to remove the centre column is also useful for really low-level shots.


Source from:  http://www.digitalcameraworld.com/2016/03/15/how-to-set-up-a-tripod-the-right-way/

March 15, 2016


Read more about digital camera.

Monday, March 14, 2016

Walking Among the Bristlecone Pines

At this time when many of us are excited by the new camera announcements, I thought it will be intriguing to do a write up describing my first time shooting 35 mm black and white film. Last summer, I found some time to swing by the Ancient Bristlecone Pine Forest in White Mountains near Bishop, California. I knew that the timing of my trip will not coincide with the best lighting for photography, especially in color. So, I decided to photograph these ancient trees in B/W. Why B/W film? Well, I have always wanted to enjoy the aesthetics of it as well as I thought it will force me to think in terms of highlights, shadows and texture. All in all, a good learning experience.

Walking with the Ancients (2)
A Bristlecone Pine in the rugged White Mountains, near Bishop, CA
Since this was a side trip, I wanted to keep my equipment fairly simple and light. I chose my trusted Nikon FE together with Nikon 24mm f/2.8 AI and Nikon 75-150 f/3.5 E AI lenses. This trio can be acquired used in very good condition for about $ 250! Both these lenses are very sharp when stopped down to f/8 and hold reasonably well upto f/16 (they also make an excellent backpacking combo with Nikon D610 or D750). Also, the common 52 mm thread meant that I can share a polarizer and an orange filter between them. Orange filter? Now why is that needed?
Walking with the Ancients (6)
Texture of an ancient Bristlecone Pine
Walking with the Ancients (1)
Details of an ancient Bristlecone Pine bark
An orange filter as the name suggests allows orange-red wavelengths to pass and blocks violet-blue light. This darkens the blues and helps the clouds to stand out more in the sky. Moreover, the bristlecone pines have orange barks. These will be rendered as white (or comparatively brighter), which will increase contrast in the texture. It should be noted that a red filter will do the same and even more so. I chose an orange filter to play a little safe for it was the first time for me shooting B/W film with filters.
Walking with the Ancients (8)
Clouds frame the Bristlecone Pine, Discovery trail in White Mountains
Walking with the Ancients (4)
Clouds, shadows and an ancient Bristlecone Pine
Since, orange filters alter the luminosity selectively, which in turn may also modify the response of b/w film, there is a consensus among photographers that some exposure compensation is required. I spend some time reading about this and found a variety of recommendations- from +0.5 EV to +3 EV, which left me confused. In the end I decided to bracket exposures and draw a conclusion of my own. I found that about one-third to two-third of positive exposure compensation works well for an SLR camera that uses TTL metering. This is easily accomplished by setting the ISO (ASA) speed appropriately. For example, I was using Ilford FP4+, which has a box ISO speed of 125. In my Nikon FE, I set the ISO dial to 80, thus allowing +2/3 stop of exposure compensation. I chose ILFORD FP4+ because of its pleasing tonality and almost endless highlight headroom. This film takes overexposure with such an aplomb that with careful scanning one can recover highlight details from a scene overexposed by 2-3 stops (maybe more!).
Walking with the Ancients (9)
Pine in the rugged rocky terrain of the White Mountains. Sierra Nevada range is seen at a distance.
Walking with the Ancients (3)
Bristlecone Pine with Sierras in the background
At the Ancient Bristlecone Pine forest, I hiked the Discovery loop at the Schulman Grove. It is a one mile trail that saves the best for the end if hiked in a counter-clockwise fashion. I spent about two hours here, stopping several times, looking for compositions and making photos. The bristlecone pines are very photogenic and each tree has a character of its own. I recall myself being enthralled and completely absorbed on the trail. It is fascinating to imagine that several of these trees were already thousand(s) of years old when Jesus Christ was born.
Walking with the Ancients (5)
Tree waves and clouds, Schulman Grove, White Mountains, CA
Walking with the Ancients (10)
Trees and texture, Schulman Grove, White Mountains, CA
Fl
The film was developed at ILFORD LAB DIRECT and I scanned it using my Nikon Coolscan 5000 (the b/w mode works quite well). Since the digital ICE (scratch and dust removal) tool in the scanner is not suited for traditional B/W film, dust spots and scratches need to be removed manually, which adds to the scanning time and effort. I also used contrast curves and minor dodging and burning in Photoshop to reach these final selected images. I hope you enjoyed them it will be great to hear comments/feedback. In the end, I will share a photo of Tuolumne Meadows in Yosemite National Park that I clicked while driving to Bishop.
Walking with the Ancients (7)
Storm clouds over Tuolumne Meadows, Yosemite National Park, CA

The post Walking Among the Bristlecone Pines appeared first on Photography Life.
Photography Life

If you are interested in Digital Photography, check it out here for more details.

Thursday, March 10, 2016

Canon announces budget-friendly EOS Rebel T6 (1300D)

 
Canon has announced its latest entry-level DSLR, the Rebel T6, which is known as the EOS 1300D in most regions. The T6 is a relatively minor update to the Rebel T5 (EOS 1200D) and adds a faster Digic 4+ processor, higher resolution LCD, ‘white priority’ WB mode (which produces more neutral color in tungsten lighting), a food scene mode and Wi-Fi with NFC.
The T6 retains the same 18MP APS-C CMOS sensor, 9-point AF system, Full HD video capture and numerous scene and creative modes as its predecessor.

The Rebel T6 will ship in the US next month at a price of $ 549, which includes the 18-55mm F3.5-5.6 IS II lens.


Press release:

Share moments on-the-go with the new Canon EOS Rebel T6 DSLR Camera

Become the next Internet sensation with built-in Wi-Fi®and NFC connectivity*

MELVILLE, N.Y., March 10, 2016 – Canon U.S.A., Inc., a leader in digital imaging solutions, today announced its newest entry-level DSLR camera, the EOS Rebel T6. The Canon EOS Rebel T6 camera offers easy sharing of high quality photos and videos to popular social media sites via compatible smartphones and other mobile devices* as well as Canon’s Connect Station CS100.

“Smartphone users passionate about photography and ready to take that next step to creating their best images and videos ever will appreciate the ease-of-use and affordability of the new EOS Rebel T6 camera,” said Yuichi Ishizuka, president and COO, Canon U.S.A., Inc. “With the latest addition of the EOS Rebel T6 camera, the Canon EOS Rebel series continues to be one of the most popular DSLR camera lines on the market.”

The Canon EOS Rebel T6 DSLR camera offers a wide range of features including:

  • 18.0 Megapixel Canon CMOS (APS-C) image sensor and high-performance DIGIC 4+ Image Processor for excellent image quality and speedy operation.
  • ISO 100–6400 (expandable to H: 12800) for shooting from bright light to low light.
  • Built-in Wi-Fi® and NFC connectivity* for easy sharing to smart devices, social media sites and the Canon Connect Station CS100 device.
  • 9‐point AF system (including one center cross‐type AF point) and AI Servo AF provide impressive autofocus performance with accurate results.
  • High-performance Optical Viewfinder helps facilitate quick and accurate focusing by firmly framing and capturing the subject at hand.
  • Large, 3.0-inch LCD monitor with 920,000 dots for easy viewing and reviewing.
  • Full HD video mode for high quality, easy-to-use video capture.

Missed Photo Ops a Thing of the Past

The Canon EOS Rebel T6 camera provides a wide ISO range of 100-6400 (expandable to ISO 12800), making it ideal for shooting both still and moving subjects in a wide variety of lighting conditions ranging from low light to bright sunny days. In addition, the camera is capable of shooting high-resolution 18 megapixel still photos continuously up-to-three frames per second (fps), with predictive autofocus to help keep every image sharp and clear, even with moving subjects.

The Scene Intelligent Auto mode in the Canon  EOS Rebel T6 camera analyzes the image, accounting for faces, colors, brightness, moving objects, contrast and whether the camera is handheld or on a tripod. Scene Intelligent Auto mode then chooses the exposure and enhancements that can bring out the beauty in virtually any scene or situation. Simplifying DSLR image capture, Scene Intelligent Auto mode lets you concentrate on composing images without puzzling over settings.

Another exciting addition to the Canon EOS Rebel T6 camera is a new ‘Food Mode’ on the mode dial for the foodie or blogger to easily capture stunning images of the food they love. This mode enhances the color and brightness of the food images while at the same time making the images ready to share. Other fully automatic exposure modes include portrait, night portrait, landscape, sports, and close-up. Additionally, the easy-to-use Full HD video mode captures sharp, high-definition video up to 1080p resolution with the choice of automatic or manual focusing. Creative filters such as Fisheye, Toy Camera, Miniature, and Soft Focus give users additional ways to create fun and imaginative images to enjoy, print and share.  The camera’s new “white priority” Auto White Balance setting enables users to create images with a more neutral tone when shooting under incandescent lighting. In addition to all the automatic modes, the new Canon EOS Rebel T6 camera provides complete manual exposure and focus controls plus RAW image output for advanced amateur photographers and photography students.

The Canon EOS Rebel T6 camera is compatible with the entire Canon EF and EF-S lens system including over 60 current models enabling users to capture their world in different perspectives ranging from Fisheye to Super-Telephoto. Scheduled for availability in April 2016, the estimated retail price of the Canon EOS Rebel T6 camera will be $ 549.99** when bundled with the EF-S 18-55mm f/3.5-5.6 IS II standard zoom lens.

* Compatible with iOS® versions 7.1/8.4/9.0, AndroidTM smartphone and tablet versions 4.0/4.1/4.2/4.3/4.4/5.0/5.1.  Data charges may apply with the download of the free Canon Camera Connect app. This app helps enable you to upload images to social media services. Please note that image files may contain personally identifiable information that may implicate privacy laws. Canon disclaims and has no responsibility for your use of such images. Canon does not obtain, collect or use such images or any information included in such images through this app.

**Availability, prices, and specifications are subject to change without notice. Actual prices are set by individual dealers and may vary.

Canon EOS Rebel T6 / EOS 1300D specifications

Price
MSRP $ 549.99 (with 18-55mm F3.5-5.6 IS II lens)
Body type
Body type Compact SLR
Body material Composite
Sensor
Max resolution 5184 x 3456
Other resolutions 3456 x 2304, 2592 x 1728, 1920 x 1080, 720 x 480
Image ratio w:h 1:1, 4:3, 3:2, 16:9
Effective pixels 18 megapixels
Sensor photo detectors 19 megapixels
Sensor size APS-C (22.3 x 14.9 mm)
Sensor type CMOS
Processor Digic 4+
Color space sRGB, AdobeRGB
Color filter array Primary color filter
Image
ISO Auto, ISO 100-6400, expandable to 12800
Boosted ISO (maximum) 12800
White balance presets 6
Custom white balance Yes
Image stabilization No
Uncompressed format RAW
JPEG quality levels Fine, Normal
File format
  • JPEG
  • RAW (Canon CR2, 14-bit)
Optics & Focus
Autofocus
  • Contrast Detect (sensor)
  • Phase Detect
  • Multi-area
  • Center
  • Selective single-point
  • Tracking
  • Single
  • Continuous
  • Face Detection
  • Live View
Autofocus assist lamp Yes (flash)
Digital zoom No
Manual focus Yes
Number of focus points 9
Lens mount Canon EF/EF-S
Focal length multiplier 1.6×
Screen / viewfinder
Articulated LCD Fixed
Screen size 3″
Screen dots 920,000
Touch screen No
Screen type TFT LCD
Live view Yes
Viewfinder type Optical (pentamirror)
Viewfinder coverage 95%
Viewfinder magnification 0.8×
Photography features
Minimum shutter speed 30 sec
Maximum shutter speed 1/4000 sec
Exposure modes
  • Scene Intelligent Auto
  • Program
  • Shutter Priority
  • Aperture Priority
  • Manual
Scene modes
  • Landscape
  • Close-up
  • Sports
  • Food
  • Night Portrait
Built-in flash Yes (Pop-up)
Flash range 9.20 m (at ISO 100)
External flash Yes (via hot shoe)
Flash modes Auto, On, Off, Red-eye
Flash X sync speed 1/200 sec
Drive modes
  • Single
  • Continuous
  • Self-timer
  • Continuous w/self-timer
Continuous drive 3.0 fps
Self-timer Yes (2 or 10 sec)
Metering modes
  • Multi
  • Center-weighted
  • Partial
Exposure compensation ±5 (at 1/3 EV, 1/2 EV steps)
AE Bracketing ±2 (3 frames at 1/3 EV, 1/2 EV steps)
WB Bracketing Yes
Videography features
Resolutions 1920 x 1080 (30p, 24p), 1280 x 720 (60p), 640 x 480 (30p)
Format MPEG-4, H.264
Microphone Mono
Speaker Mono
Storage
Storage types SD/SDHC/SDXC card
Connectivity
USB USB 2.0 (480 Mbit/sec)
HDMI Yes (mini-HDMI)
Microphone port No
Headphone port No
Wireless Built-In
Wireless notes 802.11b/g/n with NFC
Remote control Yes (wired or wireless)
Physical
Environmentally sealed No
Battery Battery Pack
Battery description Lithium-Ion LP-E10 rechargeable battery & charger
Battery Life (CIPA) 500
Weight (inc. batteries) 485 g (1.07 lb / 17.11 oz)
Dimensions 129 x 101 x 78 mm (5.08 x 3.98 x 3.07″)
Other features
Orientation sensor Yes
GPS None

Articles: Digital Photography Review (dpreview.com)

If you are interested in Digital Camera, check it out here for more details.


from SLR Camera http://ift.tt/1pzhWTk

The Importance of Constructive Feedback in Photography

Most of us have received critiques of our work at some point of our life. Some of the most subjective feedback is that directed at works of art. Photography is no exception.

With a lot of people picking up photography as a hobby, it’s no wonder that a lot of photography related forums are created with the purpose of sharing. And one of the popular subjects of these groups is critique, where members get to give “constructive” comments with the hope that it will help the image maker. The reverse is also true where a photographer posts his best shot and hopes to get constructive and helpful criticism in order to learn from the more experienced photographers.

american beach photo

Photo by Kim Seng.

When I took a course on image analysis with the Photographic Society of America (PSA), when I first started photography, the most important aspect I learned about giving constructive feedback is to put it forth as my own point of view.

Why is this “own point of view” so important?

Photography is so subjective that an image can gather equal amount of “likes” and “dislikes” at the same time. My tutor told me that it is subjective to the point of being ridiculous. Each and every one of us perceives beauty in our own way. Not just beauty, but almost everything in life, right? Some of us like eating steak, while some would rather stay away from meat. Some of us like to remain single, while some would rather marry and have 10 children.

That being said, the image maker, too, perceives beauty differently from the one critiquing the work. To the one posting the image, it might be his best shot and he thinks of it as being perfect. I’ve been there when I started photography. I thought what I’d shot was very good. Boy was I wrong. If I were to look back at my very first batch of photographs, I would be appalled and would give myself the harshest of critiques. But hey, we were all once amateurs. And everyone is learning all the time and wants to improve. So the main thing is not to belittle anybody, because we were most likely in their shoes at some point.

asian photography

Photo by Sakhar Nair; ISO 400, f/11, 1/1600 exposure.

So, if we don’t have the “eyes” now to critique and comment on our current work, what better way than to ask those who have been there done that. A word of caution: when you put your work out there in the open, be prepared and open minded to receive comments and criticism from those who have not been there done that.

Sometimes, you can get ideas spinning off from even those who are very new to the art of photography.

Back to the subject of “own point of view,” it’s imperative that we start off our critiques with preambles. Not those legal mumbo-jumbo kind of preambles, but something as simple as, “In my opinion…” This is to tell the reader that whatever is going to be said is purely your own opinion. It’s nothing personal.

Avoid Rules

What I’ve learned from PSA is to look at different aspects of photography when giving criticism and comments. And also avoid rules like the rule of thirds. Stay away from these rules of photography when giving comments, because they’re not prerequisites when making a photo. Nothing is ever fixed in the world of art. Why should it be? We would live in a world of zero creativity if everything was so rigid. So stay away from giving comments like, “It would be better if you had used the rule of thirds to compose this image.”

Oh yeah, and stay away from, “It would be better… ” and the super imposing, “If I were you…”

street photography

Photo by Adrian Cabrero; ISO 100, f/2, 1/2000 exposure.

What to Look for in a Photo

What are the aspects to look for? Here are some…

  • Creativity
  • Originality
  • Noise and/or Grain
  • Composition
  • Line
  • Eye Movement
  • Lighting
  • Focus, depth of field
  • Exposure
  • Dimension
  • Perspective
  • Tonal Range
  • Color
  • Impact
  • Balance

During the course, I was asked to comment on one of Henri Cartier-Bresson’s most revered images. I didn’t know this person or his work at that time. So I just gave my comments. Luckily for me, I started off the critique with, “I think… “, “In my opinion… “, and “To me… ” Only when my tutor told me that prints of the image are being sold at galleries for $ 10,000 each, and that it is okay to comment as long as it is our opinion, did I begin to reflect upon the fact that art is so subjective.

In essence, write your comments with the preamble, be nice with your words, and never be a jerk.

Another note in “courteous” critiquing would be to separate our good comments and suggestions. Try to put across all the good points first, then give your suggestions. Do not say something like, “I personally feel that the image is well done, but…”

It’s the BUT that is the pain in the BUTT.

nighttime cityscape

Photo by Flickr user Roger; ISO 1600, f/4.5, 0.4-second exposure.

Say your suggestions separately, so that the image maker can keep all the positive comments and then learn from the critique.

And last but not least, although sometimes it’s better to keep quiet if what we are going to say could potentially offend someone, it’s also important to note that constructive criticism can teach us a thing or two about our own work. Most of the time saying what we already know reinforces our knowledge and can open doors to new knowledge. Do it with tact and humility.

Someone once said that we don’t live long enough to be anything but amateurs.

So when putting across what you think, say it like you know it, but make it sound like you know nothing.

Good luck!

About the Author:
Fauzi Anuar (http://ift.tt/1TuLuOv) is a qualified master photographer (AMPA) specialising in portraiture, interiors and food.


Go to full article: The Importance of Constructive Feedback in Photography

What are your thoughts on this article? Join the discussion on Facebook

Article from: PictureCorrect

PictureCorrect


If you are interested in SLR Camera, check it out here for more details.


from SLR Camera http://ift.tt/1R9ec7j

Canon announces budget-friendly EOS Rebel T6 (1300D)


 Canon has announced its latest entry-level DSLR, the Rebel T6, which is known as the EOS 1300D in most regions. The T6 is a relatively minor update to the Rebel T5 (EOS 1200D) and adds a faster Digic 4+ processor, higher resolution LCD, 'white priority' WB mode (which produces more neutral color in tungsten lighting), a food scene mode and Wi-Fi with NFC.

 The T6 retains the same 18MP APS-C CMOS sensor, 9-point AF system, Full HD video capture and numerous scene and creative modes as its predecessor.
The Rebel T6 will ship in the US next month at a price of $ 549, which includes the 18-55mm F3.5-5.6 IS II lens.


Press release:

Share moments on-the-go with the new Canon EOS Rebel T6 DSLR Camera

Become the next Internet sensation with built-in Wi-Fi®and NFC connectivity*
MELVILLE, N.Y., March 10, 2016 – Canon U.S.A., Inc., a leader in digital imaging solutions, today announced its newest entry-level DSLR camera, the EOS Rebel T6. The Canon EOS Rebel T6 camera offers easy sharing of high quality photos and videos to popular social media sites via compatible smartphones and other mobile devices* as well as Canon’s Connect Station CS100.
“Smartphone users passionate about photography and ready to take that next step to creating their best images and videos ever will appreciate the ease-of-use and affordability of the new EOS Rebel T6 camera,” said Yuichi Ishizuka, president and COO, Canon U.S.A., Inc. “With the latest addition of the EOS Rebel T6 camera, the Canon EOS Rebel series continues to be one of the most popular DSLR camera lines on the market.”
The Canon EOS Rebel T6 DSLR camera offers a wide range of features including:
  • 18.0 Megapixel Canon CMOS (APS-C) image sensor and high-performance DIGIC 4+ Image Processor for excellent image quality and speedy operation.
  • ISO 100–6400 (expandable to H: 12800) for shooting from bright light to low light.
  • Built-in Wi-Fi® and NFC connectivity* for easy sharing to smart devices, social media sites and the Canon Connect Station CS100 device.
  • 9‐point AF system (including one center cross‐type AF point) and AI Servo AF provide impressive autofocus performance with accurate results.
  • High-performance Optical Viewfinder helps facilitate quick and accurate focusing by firmly framing and capturing the subject at hand.
  • Large, 3.0-inch LCD monitor with 920,000 dots for easy viewing and reviewing.
  • Full HD video mode for high quality, easy-to-use video capture.
Missed Photo Ops a Thing of the Past
The Canon EOS Rebel T6 camera provides a wide ISO range of 100-6400 (expandable to ISO 12800), making it ideal for shooting both still and moving subjects in a wide variety of lighting conditions ranging from low light to bright sunny days. In addition, the camera is capable of shooting high-resolution 18 megapixel still photos continuously up-to-three frames per second (fps), with predictive autofocus to help keep every image sharp and clear, even with moving subjects.
The Scene Intelligent Auto mode in the Canon  EOS Rebel T6 camera analyzes the image, accounting for faces, colors, brightness, moving objects, contrast and whether the camera is handheld or on a tripod. Scene Intelligent Auto mode then chooses the exposure and enhancements that can bring out the beauty in virtually any scene or situation. Simplifying DSLR image capture, Scene Intelligent Auto mode lets you concentrate on composing images without puzzling over settings.
Another exciting addition to the Canon EOS Rebel T6 camera is a new ‘Food Mode’ on the mode dial for the foodie or blogger to easily capture stunning images of the food they love. This mode enhances the color and brightness of the food images while at the same time making the images ready to share. Other fully automatic exposure modes include portrait, night portrait, landscape, sports, and close-up. Additionally, the easy-to-use Full HD video mode captures sharp, high-definition video up to 1080p resolution with the choice of automatic or manual focusing. Creative filters such as Fisheye, Toy Camera, Miniature, and Soft Focus give users additional ways to create fun and imaginative images to enjoy, print and share.  The camera’s new “white priority” Auto White Balance setting enables users to create images with a more neutral tone when shooting under incandescent lighting. In addition to all the automatic modes, the new Canon EOS Rebel T6 camera provides complete manual exposure and focus controls plus RAW image output for advanced amateur photographers and photography students.
The Canon EOS Rebel T6 camera is compatible with the entire Canon EF and EF-S lens system including over 60 current models enabling users to capture their world in different perspectives ranging from Fisheye to Super-Telephoto. Scheduled for availability in April 2016, the estimated retail price of the Canon EOS Rebel T6 camera will be $ 549.99** when bundled with the EF-S 18-55mm f/3.5-5.6 IS II standard zoom lens.
* Compatible with iOS® versions 7.1/8.4/9.0, AndroidTM smartphone and tablet versions 4.0/4.1/4.2/4.3/4.4/5.0/5.1.  Data charges may apply with the download of the free Canon Camera Connect app. This app helps enable you to upload images to social media services. Please note that image files may contain personally identifiable information that may implicate privacy laws. Canon disclaims and has no responsibility for your use of such images. Canon does not obtain, collect or use such images or any information included in such images through this app.
**Availability, prices, and specifications are subject to change without notice. Actual prices are set by individual dealers and may vary.

Canon EOS Rebel T6 / EOS 1300D specifications

Price
MSRP$ 549.99 (with 18-55mm F3.5-5.6 IS II lens)
Body type
Body typeCompact SLR
Body materialComposite
Sensor
Max resolution5184 x 3456
Other resolutions3456 x 2304, 2592 x 1728, 1920 x 1080, 720 x 480
Image ratio w:h1:1, 4:3, 3:2, 16:9
Effective pixels18 megapixels
Sensor photo detectors19 megapixels
Sensor sizeAPS-C (22.3 x 14.9 mm)
Sensor typeCMOS
ProcessorDigic 4+
Color spacesRGB, AdobeRGB
Color filter arrayPrimary color filter
Image
ISOAuto, ISO 100-6400, expandable to 12800
Boosted ISO (maximum)12800
White balance presets6
Custom white balanceYes
Image stabilizationNo
Uncompressed formatRAW
JPEG quality levelsFine, Normal
File format
  • JPEG
  • RAW (Canon CR2, 14-bit)
Optics & Focus
Autofocus
  • Contrast Detect (sensor)
  • Phase Detect
  • Multi-area
  • Center
  • Selective single-point
  • Tracking
  • Single
  • Continuous
  • Face Detection
  • Live View
Autofocus assist lampYes (flash)
Digital zoomNo
Manual focusYes
Number of focus points9
Lens mountCanon EF/EF-S
Focal length multiplier1.6×
Screen / viewfinder
Articulated LCDFixed
Screen size3″
Screen dots920,000
Touch screenNo
Screen typeTFT LCD
Live viewYes
Viewfinder typeOptical (pentamirror)
Viewfinder coverage95%
Viewfinder magnification0.8×
Photography features
Minimum shutter speed30 sec
Maximum shutter speed1/4000 sec
Exposure modes
  • Scene Intelligent Auto
  • Program
  • Shutter Priority
  • Aperture Priority
  • Manual
Scene modes
  • Landscape
  • Close-up
  • Sports
  • Food
  • Night Portrait
Built-in flashYes (Pop-up)
Flash range9.20 m (at ISO 100)
External flashYes (via hot shoe)
Flash modesAuto, On, Off, Red-eye
Flash X sync speed1/200 sec
Drive modes
  • Single
  • Continuous
  • Self-timer
  • Continuous w/self-timer
Continuous drive3.0 fps
Self-timerYes (2 or 10 sec)
Metering modes
  • Multi
  • Center-weighted
  • Partial
Exposure compensation±5 (at 1/3 EV, 1/2 EV steps)
AE Bracketing±2 (3 frames at 1/3 EV, 1/2 EV steps)
WB BracketingYes
Videography features
Resolutions1920 x 1080 (30p, 24p), 1280 x 720 (60p), 640 x 480 (30p)
FormatMPEG-4, H.264
MicrophoneMono
SpeakerMono
Storage
Storage typesSD/SDHC/SDXC card
Connectivity
USBUSB 2.0 (480 Mbit/sec)
HDMIYes (mini-HDMI)
Microphone portNo
Headphone portNo
WirelessBuilt-In
Wireless notes802.11b/g/n with NFC
Remote controlYes (wired or wireless)
Physical
Environmentally sealedNo
BatteryBattery Pack
Battery descriptionLithium-Ion LP-E10 rechargeable battery & charger
Battery Life (CIPA)500
Weight (inc. batteries)485 g (1.07 lb / 17.11 oz)
Dimensions129 x 101 x 78 mm (5.08 x 3.98 x 3.07″)
Other features
Orientation sensorYes
GPSNone 

Articles: Digital Photography Review (dpreview.com)

If you are interested in Digital Camera, check it out here for more details.


The Importance of Constructive Feedback in Photography


Most of us have received critiques of our work at some point of our life. Some of the most subjective feedback is that directed at works of art. Photography is no exception.
With a lot of people picking up photography as a hobby, it’s no wonder that a lot of photography related forums are created with the purpose of sharing. And one of the popular subjects of these groups is critique, where members get to give “constructive” comments with the hope that it will help the image maker. The reverse is also true where a photographer posts his best shot and hopes to get constructive and helpful criticism in order to learn from the more experienced photographers.
american beach photo
Photo by Kim Seng.
When I took a course on image analysis with the Photographic Society of America (PSA), when I first started photography, the most important aspect I learned about giving constructive feedback is to put it forth as my own point of view.
Why is this “own point of view” so important?
Photography is so subjective that an image can gather equal amount of “likes” and “dislikes” at the same time. My tutor told me that it is subjective to the point of being ridiculous. Each and every one of us perceives beauty in our own way. Not just beauty, but almost everything in life, right? Some of us like eating steak, while some would rather stay away from meat. Some of us like to remain single, while some would rather marry and have 10 children.
That being said, the image maker, too, perceives beauty differently from the one critiquing the work. To the one posting the image, it might be his best shot and he thinks of it as being perfect. I’ve been there when I started photography. I thought what I’d shot was very good. Boy was I wrong. If I were to look back at my very first batch of photographs, I would be appalled and would give myself the harshest of critiques. But hey, we were all once amateurs. And everyone is learning all the time and wants to improve. So the main thing is not to belittle anybody, because we were most likely in their shoes at some point.
asian photography
Photo by Sakhar Nair; ISO 400, f/11, 1/1600 exposure.
So, if we don’t have the “eyes” now to critique and comment on our current work, what better way than to ask those who have been there done that. A word of caution: when you put your work out there in the open, be prepared and open minded to receive comments and criticism from those who have not been there done that.
Sometimes, you can get ideas spinning off from even those who are very new to the art of photography.
Back to the subject of “own point of view,” it’s imperative that we start off our critiques with preambles. Not those legal mumbo-jumbo kind of preambles, but something as simple as, “In my opinion…” This is to tell the reader that whatever is going to be said is purely your own opinion. It’s nothing personal.

Avoid Rules

What I’ve learned from PSA is to look at different aspects of photography when giving criticism and comments. And also avoid rules like the rule of thirds. Stay away from these rules of photography when giving comments, because they’re not prerequisites when making a photo. Nothing is ever fixed in the world of art. Why should it be? We would live in a world of zero creativity if everything was so rigid. So stay away from giving comments like, “It would be better if you had used the rule of thirds to compose this image.”
Oh yeah, and stay away from, “It would be better… ” and the super imposing, “If I were you…”
street photography
Photo by Adrian Cabrero; ISO 100, f/2, 1/2000 exposure.

What to Look for in a Photo

What are the aspects to look for? Here are some…
  • Creativity
  • Originality
  • Noise and/or Grain
  • Composition
  • Line
  • Eye Movement
  • Lighting
  • Focus, depth of field
  • Exposure
  • Dimension
  • Perspective
  • Tonal Range
  • Color
  • Impact
  • Balance
During the course, I was asked to comment on one of Henri Cartier-Bresson’s most revered images. I didn’t know this person or his work at that time. So I just gave my comments. Luckily for me, I started off the critique with, “I think… “, “In my opinion… “, and “To me… ” Only when my tutor told me that prints of the image are being sold at galleries for $ 10,000 each, and that it is okay to comment as long as it is our opinion, did I begin to reflect upon the fact that art is so subjective.
In essence, write your comments with the preamble, be nice with your words, and never be a jerk.
Another note in “courteous” critiquing would be to separate our good comments and suggestions. Try to put across all the good points first, then give your suggestions. Do not say something like, “I personally feel that the image is well done, but…”
It’s the BUT that is the pain in the BUTT.
nighttime cityscape
Photo by Flickr user Roger; ISO 1600, f/4.5, 0.4-second exposure.
Say your suggestions separately, so that the image maker can keep all the positive comments and then learn from the critique.
And last but not least, although sometimes it’s better to keep quiet if what we are going to say could potentially offend someone, it’s also important to note that constructive criticism can teach us a thing or two about our own work. Most of the time saying what we already know reinforces our knowledge and can open doors to new knowledge. Do it with tact and humility.
Someone once said that we don’t live long enough to be anything but amateurs.
So when putting across what you think, say it like you know it, but make it sound like you know nothing.
Good luck!
About the Author:
Fauzi Anuar (http://www.zeeandmarina.com/) is a qualified master photographer (AMPA) specialising in portraiture, interiors and food.

Go to full article: The Importance of Constructive Feedback in Photography

What are your thoughts on this article? Join the discussion on Facebook

Article from: PictureCorrect

PictureCorrect


If you are interested in SLR Camera, check it out here for more details.