Tuesday, September 29, 2015

How to use ND grad filters… and when to avoid them

Learn how to darken the heavens and create better landscapes as we show you how to use ND grad filters… and when you should avoid them.

How to use ND grad filters… and when to avoid them

You have a beautiful landscape before you, but capturing one balanced exposure of the bright sky and darker land is an impossible task. What you need is a graduated neutral density filter (ND grad).

With an ND grad attached to the front of your lens you’ll instantly be able to capture landscapes with much darker and more dramatic skies, while also exposing for the darker landscape to brighten up your foregrounds.

The top half of an ND grad is coloured neutral grey, graduating into clear at the bottom.

The top is positioned to cover the brighter sky, while the clear section leaves the darker land area unaffected. You then set your exposure for the brighter land, while the ND grad ensures the sky remains dark.

It’s also easy to add digital ND grad filters in Photoshop – as I demonstrate over the page – but capturing a brilliant, balanced exposure of a beautiful landscape in-camera can’t be beaten.

SEE MORE: Using ND grad filters – how to fix murky foregrounds and overexposed skies

How to select and set up your ND grad filter

How to select and set up your ND grad filter: step 1

01 Stop! ND grad time!
ND grads come in different strengths; a set of grads usually has 1-stop, 2-stop and 3-stop filters (labelled 0.3, 0.6 and 0.9, or ND2, 4 or 8, depending on manufacturer) enabling you to pick the right filter for the brightness difference in your scene.

SEE MORE: 5 essential camera filters you and why you can’t live without them

How to select and set up your ND grad filter: step 2

02 Soft or hard?
ND grads have ‘hard’ or ‘soft’ graduations from dark to clear. Hard ND grads are ideal for straight and uncluttered horizons, such as seascapes. Soft ND grads are better when the horizon’s more irregular, such as typical landscapes with trees and hills.

SEE MORE: 10 quick landscape photography tips

How to select and set up your ND grad filter: step 3

03 Holders & adaptor rings
You’ll need a filter holder to slot your ND grads into, plus an ‘adaptor ring’ – one end screws into the filter thread of the lens, the other snaps into the holder – you’ll need an adaptor ring for each different-diameter lens that you intend to use.

SEE MORE: 9 common filter mistakes every photographer makes (and how to avoid them)

How to select and set up your ND grad filter: step 4

04 Which brand to choose?
For those on budget, a set of three square Cokin ND grads with holder costs around £39 ($ 80). While larger rectangular Lee Filters are favoured by many professionals, as they capture minimal colour casts, but a set of three costs £155 ($ 275).

SEE MORE: Using filters – the only cheat sheet you need to get beautifully balanced exposures

How to select and set up your ND grad filter: step 5

05 Which strength filter?
To work out which ND grad you need, in Av mode at f/16, zoom in and take a shot of just the land, then only the sky. If the land reads 1/200 sec and the sky 1/25 sec, that’s three stops difference (1/200-1/100-1/50-1/25) so you’ll need a 3-stop filter.

SEE MORE: Best photography accessories – transform your images for less than £100!

How to select and set up your ND grad filter: step 6

06 Capturing a balanced shot
Screw on your adapter ring, attach the holder, and slot in a 3-stop ND grad filter. Use a tripod to compose your shot, then adjust the filter so the graduation is over the horizon. Switch to Manual mode and use the ‘land’ exposure of 1/25 sec at f/16.

Quick Tip
Turn two filters into one mega 5-stop ND grad by stacking 2-stop and 3-stop filters together in your filter holder

SEE MORE: How and when to use ND filters (and what the numbers mean)

When to avoid using an ND grad filter

Don’t use graduated neutral density filters on the following types of shots

When to avoid using an ND grad filter: big objects

Big objects
As you can see, using an ND grad here has left the tree looking very dark and underexposed. Avoid using filters when large objects fill most of the sky.

When to avoid using an ND grad filter: uneven horizons

Very uneven horizons
If your landscape has mountains or trees at the sides, an ND grad will darken the tops of these, making them look very underexposed compared to the lighter skies.

When to avoid using an ND grad filter: already dark skies

Skies that are already dark
If your scene already has a dark and moody sky, you’ll end up with a very unbalanced, unnatural shot if you use an ND grad filter to darken it further.

SEE MORE: How to use a graduated filter the wrong way round

How to add a digital graduated filter in post-processing

Learn the fast way to darken the skies and brighten the foregrounds of your Raw images in Adobe Camera Raw

How to add a digital graduated filter in post-processing: step 1

01 Use Adobe Camera Raw
One of my favourite tricks these days is to take an average exposure for a whole scene, then add two digital ND grads to my Raw image in ACR; one to darken the sky, the other to brighten the land. Open digitalgrad_start.CR2 in ACR in Photoshop CS/CC.


How to add a digital graduated filter in post-processing: step 2

02 Boost the landscape
First, I’ve enhanced the landscape area by setting Exposure +75, Contrast +37 and Shadows +22. I’ve also set Clarity +6, Vibrance +7 and Saturation +2. Now click the Graduated Filter button (among the top row of icons) to fix the overly bright sky.

SEE MORE: A layman’s guide to ND filters

How to add a digital graduated filter in post-processing: step 3

03 Darken the skies
Set Exposure -1.50, Contrast +10, Clarity +10, and Saturation +5. Click once in the middle of the sky then drag the graduated filter to just below the horizon. As our mountainous horizon isn’t level, I’ve angled the graduation slightly to compensate.

How to add a digital graduated filter in post-processing: step 4

04 Add more digital filters
You can quickly add more filters; zooming out helps to position them and check they look good. I added another higher up to further darken the top of the sky, but set Exposure to -1.00, and another at the bottom of the image to darken an overly bright patch of land.

READ MORE

Best graduated neutral density filters: 6 top models tested and rated
Using camera filters: the only cheat sheet you’ll ever need to get beautifully balanced pictures
ND Grad Filters: what every photographer must know
10 tips for using your 10-stop ND filter

The post How to use ND grad filters… and when to avoid them appeared first on Digital Camera World.

Digital Camera World » Photography Tips

The post How to use ND grad filters… and when to avoid them appeared first on SLR Camera.


from SLR Camera http://ift.tt/1LiwDDE

Sunday, September 27, 2015

Neewer® Photography Photo Studio Lighting Kit Set

Neewer® Photography Photo Studio Lighting Kit Set, Includes (1) 24″x24″ Light Shooting Tent / Box, (2) 5000K 50W High Output Table Top Accent Light, (4) Chromakey Backgrounds (Red, Black, White, Blue), (1) 42-Inch Camera Tripod


Neewer® Photography Photo Studio Lighting Kit Set

  • Light tents work well with both film and digital cameras. Be sure to adjust lighting as needed
  • Made of Fabric Softens and reflects lights for a perfect shot Eliminate glare
  • 1 x 24 inch x 24 inch Photo Photography Tent Studio Light Box/Tent: 4 colors non reflective fabric background included (Red, Black, White, Blue)
  • 2 x Photography Studio Photo Box Table Top Accent Light
  • 1 x 42″ Camera Camcorder Stand Tripod

More details for this kit set here.

Back to http://slrcamera.org

The post Neewer® Photography Photo Studio Lighting Kit Set appeared first on SLR Camera.


from SLR Camera http://ift.tt/1JwviS4

DJI Phantom 3 Professional Quadcopter Drone with 4K UHD Video Camera - Drone With Camera


DJI Phantom 3 Professional Quadcopter Drone with 4K UHD Video Camera
DJI Phantom 3 Professional Quadcopter Drone with 4K UHD Video Camera & CS Kit: Includes Handheld Transmitter (Radio Controller), Sandisk 32GB Ultra MicroSD Memory Card, Lexar 16GB 633x MicroSD Memory Card, SD Card Reader, 2x Intelligent Flight Batteries, Phantom 3 Backpack, 2 Sets of Propellers, Smart Battery Charger, Backpack Rain Cover, Backpack Tripod Bag & CS Microfiber Cleaning Cloth
  • 4k UHD video recording with fully stabilized 3-axis gimbal; Vision Positioning system allows stable flight indoors
  • Lightbridge digital streaming allows live viewing of 720p video (full resolution video is simultaneously recorded on the internal microSD card)
  • Included flight battery and rechargable remote controller means this system is ready to fly out of the box
  • DJI Pilot app for iOS and Android allows live viewing and complete camera control (phone/tablet sold separately; see DJI's website for compatible models)
  • Fying this product is restricted within 15 miles radius of the White House

Product Description

Style:Quadcopter Only

Product Description

The Phantom 3 Professional continues the proud tradition of DJI's Phantom series and brings several important innovations to the Phantom's rich feature set. The Phantom 3 Professional carries a fully stabilized 3-axis 4k UHD video camera for smooth, crisp videos and still photos. To allow you to see what the drone sees, DJI has engineered a new generation of their Lightbridge technology that allows 720p HD digital streaming of live video directly from the drone. You can control the camera and see video in real time as you fly and you can even share the video using the DJI Pilot app's advanced features. To aid indoor flying, the Phantom 3 Professional includes an integrated array of optical and ultrasonic sensors call Vision Positioning that allows you to fly precisely indoors without a GPS signal. The Phantom 3 Professional includes all the tried-and-true features you'd expect from a DJI drone, including GPS navigation with auto takeoffs and auto landings, intelligent high power flight battery, a built-in safety database of no fly zones, and a powerful mobile app for your iOS or Android device.
Note: DJI has locked your Phantom from being able to even start the motor if you live within a 15 mile radius of the White House. This encompasses not only D.C. but much of Prince Georges County, Arlington, Fairfax, Silver Spring, Falls Church and Montgomery County. DJI does not warn you of this prior to purchase. Outside of this 15 mile radius, the drone works great, but be aware, that if you bought it and live within the restricted zone, you will not be able to fly it, even on your own property.

Set Contains:

  • Aircraft Body (1)
  • Remote Controller (1)
  • Propeller Pairs (4)
  • Intelligent Flight Battery (1)
  • Battery Charger (1)
  • Power Cable (1)
  • Phantom 3 Professional / Advanced Safety Guidelines and Disclaimer (Manual)
  • Phantom 3 Professional / Advanced Intelligent Flight Battery Safety Guidelines (Manual)
  • Phantom 3 Professional Quick Start Guide (Manual)
  • Gimbal Clamp (1)
  • Vibration Absorbers (4)
  • 16GB Micro-SD Card (1)
  • Micro-USB Cable (1)
  • Anti-drop Kit (2)
  • Landing Pads (4)
  • Propeller Wrench (1)
  • Stickers (5 - Gold, Silver, Red, Blue, Pink)

This entry was tagged , , , ,
Bookmark the permalink.

Saturday, September 26, 2015

Fashion Photography: Brian Edwards, Indellible Ink 06, 2014

Fashion Photography: Indellible Ink 06, 2014

by Brian Edwards

Indellible Ink 06,2014 by Brian Edwards

Archival Digital
Edition 1-20 of 20
Size : 21 x 17 in.

About This Artwork

Brian came to New York from Seattle in the early '90's to pursue his lifelong dream of digging ditches. After toiling in the lower levels within the cut-throat world of manual excavation he realized that the politics of the industry were too complex and he needed to find a different path. Fashion photography seemed the obvious choice. Though he enjoys the simplicity of the photo industry, he sometimes yearns for the intense political arena and backbreaking labor of his original dream.

The post Fashion Photography: Brian Edwards, Indellible Ink 06, 2014 appeared first on SLR Camera.


from SLR Camera http://ift.tt/1WpaYLK

Photography: Complete Guide To Taking Stunning, Beautiful Pictures

Photography: Complete Guide To Taking Stunning, Beautiful Pictures

Photography Complete Guide To Taking Stunning, Beautiful Pictures


Do You Want to Learn How to Take Beautiful Pictures Do you struggle with taking beautiful pictures? Do you want to know the secrets that professional photographers use to get phenomenal pictures? Inside we give the proven techniques that some of the best photographers in the world use. Inside you will learn what equipment and angles are needed for breathtaking pictures.

Interested in SLR Camera?  Click here.

The post Photography: Complete Guide To Taking Stunning, Beautiful Pictures appeared first on SLR Camera.


from SLR Camera http://ift.tt/1MvYxZP

Friday, September 25, 2015

Lighting Accessories -Photography Photo Portrait Studio 600W Day Light Umbrella Continuous Lighting Kit by LimoStudio LMS103

Lighting Accessories -Photography Photo Portrait Studio 600W Day Light Umbrella Continuous Lighting Kit

Photography Photo Portrait Studio 600W Day Light Umbrella Continuous Lighting Kit by LimoStudio LMS103

(2) x LimoStudio 86″ Tall Studio High Output Umbrella Flash Strobe Light Stand
(1) x LimoStudio 28″ Tall Studio Quality High Output Accent Light Table Top Light Stand
(3) x LimoStudio Studio Single Head Photo Lighting Fluorescent Light Holder
(3) x LimoStudio Digital Full Spectrum Light Bulb 45W Photo CFL 6500K, Daylight Balanced, Pure White
(1) x Convenient Umbrella Carry Case | (1) x Bulb carry bag

Lighting Kit Description:

Upgraded item includes a new carrying case for your bulbs!

(2) x 33″ Photography Studio Translucent Shoot Through White Umbrella Photo Video Umbrella
Made of High Quality Nylon Construction
Works well to diffuse the light from any Flash/Strobe Light and Constant Light
Premium Umbrella Snow White translucent Reflector (33″ Wide)
Reflect and Spread light stream evenly
Eliminate glare and spots

(3) x Single Head Photo Lighting Fluorescent Light Holder
On/Off Switch
Max power can be used 105W energy saving bulb
Lamp base E26/E27 x1
Code & Plug included (9 ft.)

(2) x 86″ Tall Air Cushion Spring Studio Quality High Output Umbrella Flash Strobe Light Stand
Material: Premium Aluminum Alloy Construction
Solid Safety 3 Legs Stages
Light Weight: Easy to Move
Industrial Standard Mounting Stud

(3) x Digital Full Spectrum Light Bulb – 45W Photo CFL 6500K, Daylight Balanced
Energy Saving Compact Fluorescent Spiral Bulb – Saves energy up to 80%
Regular Screw Base
Color Temperature: 6500K
Watts: 45W – Equals to 200W Regular Incandescent Light Bulb Output
Style: Spiral
Lamp Tone: Day Light
Overall Diameter: 3.5″
Overall Length: 8″

(1) x 28″ Tall Studio Quality High Output Accent Light Table Top Light Stand
Material: Premium Aluminum Alloy Construction
Solid Safety 3 Legs Stages
Solid Locking System for Light Safety

(1) x Convenient Umbrella Carry Case
(1) x Bulb carry bag

Photo Umbrella Light
Photography Studio Light
Photography Continuous Light

From: slrcamera.org

The post Lighting Accessories -Photography Photo Portrait Studio 600W Day Light Umbrella Continuous Lighting Kit by LimoStudio LMS103 appeared first on SLR Camera.


from SLR Camera http://ift.tt/1PAwadC

Thursday, September 24, 2015

How to shoot portraits of strangers: 5 quick tips to put people at ease

One of the toughest aspects of documentary, travel and sometimes street photography is getting good portraits of strangers.

While any fool with a telephoto lens can ‘grab’ an image of somebody who doesn’t realise they are being photographed, you often get the best images if there is some kind of engagement between you and the subject.

Imagine Steve McCurry’s Afghan Girl if she was looking away, rather than directly at him. It would still be a good image, but maybe not a great one.

Even with images where Steve’s subjects are not looking directly at him, they usually know he’s there. So, if you feel shy about dealing with strangers, here are a few tips for putting them at ease to take portraits you’ll both be happy with…

SEE MORE: 21 street photography tips from the professionals

Shoot portraits on the street

1) Feel the fear, and do it anyway

This is the name of a famous self-help book, and it’s a good motto to remember. Yes, you may feel shy about approaching a particularly photogenic stranger, and that apprehension probably won’t go away, even as you get more experienced.

But your desire to get a great picture has to outweigh your shyness. So don’t put off approaching people as you ‘don’t feel confident enough yet,’ or don’t speak the language, as that moment will probably never come.

What’s the worst that can happen? They refuse, in which you case you politely thank them and move on. Don’t take it personally: they may be having a bad day, or it may be a cultural thing.

SEE MORE: Best camera settings for blurring people (free cheat sheet)

Shoot outdoor portraits with reflections: shoot in the shade

2) Chat first, photos later
This is a good tip from travel photographer Gavin Gough. If you can get some kind of interaction or conversation going with a person, or at least make eye contact with them and express interest in what they are doing, it’s a good start.

Then, when you have maybe exchanged some pleasantries or some smiles, ask (or gesture) to see if you can take their photo. If it’s a shopkeeper or market trader, buy something off them first.

This also gets around the knotty question of whether you should pay somebody for allowing you to take their photo.

Be mindful also of what lenses you are using; a shorter, smaller prime lens is usually less intimidating to someone than sticking a long zoom in their face.

SEE MORE: 5 street photography projects every first-timer should try

10 things portrait photographers should know about their craft

3) Show them the image

Another good tip is to show them the image you have just taken – very easy with a digital camera. Kids and older people in parts of the developing world may not see digital cameras that often, so while you shouldn’t patronise them, the novelty of seeing their image might get you on their side.

If the image hasn’t come out well, use it as an excuse to suggest another try. Don’t overstay your welcome, however, which brings us on to the next point.

SEE MORE: 14 portrait photography tips you’ll never want to forget

Creative photo ideas for September: 02 Use flash for portraits

4) Hang around or return the next day
After you have taken a few images, just hang around. If it’s a person at work, chances are they will forget you are there and just go back to what they are doing, which is when you often get the most interesting images.

Again, don’t push it. If you sense you are becoming annoying or distracting or irritating, move on. A big part of successful documentary and travel photography is knowing when to stop.

SEE MORE: 10 things every portrait photographer should know about their craft

Street_photography_projects_candid1

5) Get local help
Returning to Steve McCurry’s Afghan Girl image, he used a local fixer to talk to the girl and her brother to get permission for the shot – she probably wouldn’t have agreed otherwise. There are times a local fixer can really help, but don’t just book anyone.

Get advice and suggestions from other travel photographers via the many online forums, or do a Google search, but try and get a recommendation if you can, rather than going with somebody no other photographer can vouch for.

This is particularly important in areas near Syria and Iraq, as ISIS kidnappers have been known to pose online as fixers for photographers and journalists!

READ MORE

Candid street photography: lose your inhibitions and shoot portraits with impact
How to find perfect composition for your street photography
How to photograph anything: best camera settings for street photography
Urban photography: how to blur people in busy city scenes

The post How to shoot portraits of strangers: 5 quick tips to put people at ease appeared first on Digital Camera World.

Digital Camera World » Photography Tips

Interested in Digital Camera tips ? Click here for more details.

The post How to shoot portraits of strangers: 5 quick tips to put people at ease appeared first on SLR Camera.


from SLR Camera http://ift.tt/1R4EinQ

Canon EOS Rebel T5 18MP EF-S Digital SLR Camera

Canon EOS Rebel T5 18MP EF-S Digital SLR Camera USA warranty with canon EF-S 18-55mm f/3.5-5.6 IS [Image Stabilizer] II Zoom Lens & EF 75-300mm f/4-5.6 III Telephoto Zoom Lens + 58mm 2x Professional Lens +High Definition 58mm Wide Angle Lens + Auto Power Flash + UV Filter Kit with 24GB Complete Deluxe Accessory Bundle

Canon EOS Rebel T5

Canon EOS Rebel T5 18MP EF-S Digital SLR Camera Product Description:

This Photo4Less Top Value Camera And Lens With USA  and manufacturer’s supplied Accessories Kit includes
Canon EOS Rebel T5 EF-S Body – Canon Zoom Wide Angle-Normal EF-S 18-55mm f/3.5-5.6 IS Autofocus Lens – Canon Zoom Telephoto EF 75-300mm f/4.0-5.6 III Autofocus Lens
58mm 2X Professional Telephoto Lens – High Definition 58mm Wide Angle Lens – Digital DSLR Auto Power Slave Flash – Transcend 16GB Class 10 SDHC Card -Transcend 8 GB Class 10 SDHC Flash Memory Card
Photo Video Quality Tripod – Water Resistant  Camcorder & DSLR Camera Case – RS-60 Wired Remote Control  – 3 Piece Filter Kit (UV-CPL-FLD) 58mm – 58mm Ultraviolet UV Protector Filter
Hi-Speed SD USB Card Reader – Camera & Lens 3 Piece Cleaning Kit – Tri-fold Memory Card Wallet – LCD Screen Protectors (Clear) – Table Top Tripod


The post Canon EOS Rebel T5 18MP EF-S Digital SLR Camera appeared first on SLR Camera.


from SLR Camera http://ift.tt/1FhM5gI

Making Sense of Exposure

When I first started out in photography I had a tough time wrapping my head around one of its most fundamental concepts: exposure. I learned everything I could about things like aperture, light, shutter speed, highlights, shadows and dynamic range, but all these were planets orbiting a central sun called exposure and I couldn’t nail down exactly what that meant. I heard terms like “expose for the highlights” and “try to get a good exposure” sandwiched between people talking about “double exposure” and “long exposure” and my head was swimming. I figured things out eventually, but it took trial and error and cries for help to my fellow photographers (not to mention a lot of online research and books). So, then, let me help other aspiring image-makers learn a thing or two by making sense of exposure.

what-is-exposure-building

A properly exposed architecture photo.

Here’s the most basic, but informative, definition I can offer of exposure: it’s how bright or dark your photograph is. If a photo is too bright, it’s considered to be overexposed. Too dark, and it’s underexposed. But the Goldilocks-approved version of almost any picture is what’s known as a proper exposure – it’s neither too dark nor too light. All other bits aside, when people talk about getting a properly-exposed image, or tweaking camera settings to get a good exposure, all it really means is getting an image that’s not too bright or not too dark.

what-is-exposure-birthday

The bright sunlight made getting a proper exposure a bit tricky, but understanding how it works helped me get the photo I was looking for.

Sounds simple, right? It is, and yet it’s much more because photography is not just about getting things to be neither too bright or too dark. It’s up to you as a photographer to know not only how to get an image that’s properly exposed but how to adjust your camera’s settings to get the exposure you want. You might look at a given scene and decide that you want things to be a bit too bright or too dark, or you would really like some of the darker areas of the image to show up brighter, or you want to get a picture of something in broad daylight that’s normally too bright for your camera to deal with. Or perhaps you like images with extremely dark and light areas and you want to purposely create a sense of contrast while also maintaining a certain type of exposure. In Auto mode your camera will almost always try to get what it thinks is a properly-exposed image, but if you can work up the courage to try Aperture Priority, Shutter Priority, or even Manual mode you can start to control the various parameters that combine to make an image and, thus, get the precise type of exposure you want – not what your camera thinks you want.

what-is-exposure-trees-sunrise

Knowing how to adjust my exposure was critical to capturing this image. My camera’s Auto function would have left me with an unusable photo.

So how do these other elements affect exposure, and what can you do to manipulate them to get the exposure you want? This is a simple breakdown of the three most important things you need to know:

Aperture: The size of the opening in your camera lens that lets light pass through to the image sensor. A larger aperture will let more light pass through, while a smaller one will not let much light pass through.

Shutter Speed: How long the curtains in front of the image sensor are open. A longer shutter speed will let more light pass through, while a shorter shutter speed will not let much light pass through.

ISO: How sensitive your image sensor is to light. Lower ISO values mean your camera is not very sensitive to light, which means a proper exposure requires either a longer shutter speed, a wider aperture, or both. High ISO values mean your camera is very sensitive to light, which means a proper exposure requires either a shorter shutter speed, smaller aperture, or both.

what-is-exposure-silhouette

In this shot, I used a special light-blocking tool called a neutral density filter in order to get the desired exposure.

What does all this mean in practice, and how can you adjust these elements to get the exposure you want? To illustrate a few basic principles, here are some photos that show what can be done to manipulate your camera in order to get the proper exposure (combination of light and dark) that you want.

This first picture has a proper exposure: there’s some bright areas, some dark areas, and a mix of both in various sections of the photo.

what-is-exposure-even

Early morning on campus with a good overall exposure. 50mm, ISO 100, f/4.0, 1/2000 second.

Now take a look at the next one, which has been exposed for the highlights. This means I wanted to take the bright areas of the picture, specifically the sidewalk as it recedes to the horizon, and make that part be properly exposed. To do this, I had to decrease my shutter speed quite a bit, which meant that only a little bit of light was captured. Since there was so much light shining on the sidewalk, a little bit was all I needed. You’ll notice that the result illustrates a bit of a trade-off: the very bright portions of the  image are now more properly balanced and you can make out a lot more detail in the sidewalk, but the darker portions are now really dark and you can’t see much of anything.

what-is-exposure-highlights

The same scene, exposed for the highlights. 50mm, ISO 100,f/4.0, 1/5000 second.

I also took a photo of the same scene but exposed for the shadows. Since the dark areas of a given composition are not reflecting much light, you’ll need to find a way of capturing as much of it as possible. In this case, I chose to use a much longer shutter speed in order to let in much more light. Once again, you can see an immediate trade-off: the dark areas are much more colorful, but the bright areas are way too bright. If I wanted to emphasize the trees, shrubs and other greenery this is one way to do that, even though it would come at the expense of some of the color and detail on the sidewalk.

what-is-exposure-shadows

The same scene, exposed for the shadows. 50mm, ISO 100,f/6.7, 1/90 second.

If you want to try altering the exposure of a given photograph the simplest way is to use your camera’s exposure compensation function to quickly over – or under – expose your composition. Alternatively, you can manually adjust the parameters like Aperture, Shutter Speed and ISO to get the desired result. If you want to get really creative you can use different metering modes on your camera (spot, center-weighted, average, etc.) to adjust how your camera takes various sources of light into account in order to get the exposure you are looking for.

As a side note, you might have heard about a technique called HDR which stands for High Dynamic Range, and involves taking multiple exposures of the same scene and combining them on your computer using a program like Photoshop. This means you get the best of all worlds: properly exposed highlights and shadows along with a good overall balance of color throughout the image. It’s just another tool in your kit that you can utilize to get the exact image you are going for, which is why understanding exposure is so critical to photography. By knowing what it is and how to control the exposure of a scene to get the picture to turn out how you want, you can take more control over your pictures and start making creative decisions instead of leaving things up to your camera.

I hope this article clears up some confusion you might have about the subject of exposure, as it’s the kind of piece I wish I had in front of me several years ago. Do you still have questions about what exposure is all about? What are your favorite tips and tricks to deal with exposure? Leave your thoughts in the comments below.

The post Making Sense of Exposure by Simon Ringsmuth appeared first on Digital Photography School.


Digital Photography School

If you are interested in Camera Tips, check it out here for more details.

The post Making Sense of Exposure appeared first on SLR Camera.


from SLR Camera http://ift.tt/1R26wQa

Monday, September 21, 2015

Five Tips to Improve Your Travel Photography

The world can be an overwhelming sensory experience, filled with sight, sound and aroma designed to delight all of your senses. How do you capture that experience in a photograph? Most people don’t. Instead, they show their photos with an apology – “You had to be there.” Your job as a travel photographer is to take them there through your photos. So how do you make sure you come home with a killer shot?

travel photography tips

“First Light” captured by Tony Lau (Click Image to See More From Tony Lau)

Keep reading to discover five tips to unlock the secrets of how to take good pictures.

1: Know Your Gear

If you’re struggling to operate your camera, then you aren’t giving all of your attention to your composition. Make sure you know how to operate your camera. Forget about using those different modes that may have come with your camera. The problem with these idiot modes is that the camera is the idiot. It doesn’t know how to make a creative shot – it just averages everything out. You can’t rely upon these modes. Learn how to use the ISO, Aperture and Shutter Speed to make your own exposure decisions.

Different focal lengths can change the way your subject appears. Practice before you go on the trip. Use a foreground subject and take photos at different focal lengths to see how it changes as you change focal length. Pay attention to the background, too.

2: Make a Shot List

There are surely images you want to capture at your destination. Plan ahead. Write down the scenes you want to capture. Imagine you’re taking a dream trip to Paris. Most people will expect you to come home with a shot of the Eiffel Tower, but there’s much more to the city. Include shops on the street, a bakery, your meals, a bottle of champagne or cup of coffee. Every destination has its marquee landmarks, but the soul is often found in little details.

traveling photographer

“Cyclist on U Bien’s Bridge. Burma” captured by Andy Cheek (Click Image to See More From Andy Cheek)

Prioritize your list. You may not have time to get to everything on your list, Which ones are “must have” shots?

3: Work the Scene

If there’s one concept you need to accept, it’s this one: You’re going to take some lousy shots.

Don’t worry. Everyone does. There isn’t a photographer in the world who hasn’t made a bad composition. You have to work the scene until you find composition that works.

  • Walk around your subject
  • Try different angles
  • Get low on the ground
  • Get above
  • Shoot from far away
  • Shoot up close
  • Use a foreground element in your photo
  • Change your depth of field

4: Eliminate Distractions

Have you ever come across a wonderful scene, taken a photo, and felt that your shot didn’t capture the essence of being there? Trust your instincts.

It doesn’t mean that you’ve picked a bad location. Something made you stop to look. Your job is to work until you find a photo that captures the essence of that scene.

travel photo

“Victoria Memorial – Kolkata” captured by Sudipta Chakraborty (Click Image to See More From Sudipta Chakraborty)

You may have too much in the photo causing distraction. It’s too busy, there’s something ugly in the scene, or people are walking around. Start looking for things to eliminate.

There are a number of ways to remove distracting elements and get to the core of your subject. Change your angle. Get tighter on your subject to fill the frame. Change your depth of field to blur distracting backgrounds.

Photographers don’t just snap one image and walk away with a golden masterpiece. Think about what made that scene interesting to you. Was it a shape, color contrast, the way the light falls on your subject? Concentrate on the core element that makes you appreciate your subject and then get rid of the stuff you don’t need.

5: Stop! Don’t Leave Yet

OK, you found an interesting scene or subject. You’ve walked around and think you captured an interesting photo. That’s great! It’s time to go on to the next one, right?

Not so fast. Take some time to look at your photos. Evaluate what you’ve captured and consider what you’ve missed. Chances are you may not be back anytime soon, so be sure you captured everything you wanted before you leave.

Is the exposure right? Think about the shots you didn’t take. If you shot in portrait mode, look for some opportunities in landscape mode. If you shot the whole scene, ask yourself if there are some detail shots that would complement it. Explore your subject from Grand to Granular. Little details can have as much impact as the big scene.

better travel photography

“Chieu-Saigon-nhin-tu-phia-CauThu-Thiem” captured by Trandinhkhiem (Click Image to See More From Trandinhkhiem)

Remember to take plenty of pictures. It helps you discover new ways to interpret your scene and go home with the best shot you can make.

About the Author:
William Beem is a photographer and author living in Central Florida. He manages a blog offering photography tips and travel photos. Occasionally, he also provides training along with the folks at Harmon Photo’s School of Photography.

Go to full article: Five Tips to Improve Your Travel Photography

What are your thoughts on this article? Join the discussion on Facebook or Google+

Article from: PictureCorrect

PictureCorrect

If you are interested in Camera Tips, check it out here for more details.

The post Five Tips to Improve Your Travel Photography appeared first on SLR Camera.


from SLR Camera http://ift.tt/1OrcwTS

Sunday, September 20, 2015

Amazon Basics Backpack for SLR(DSLR) Cameras and Accessories

Amazon Basics Backpack for SLR(DSLR) Cameras and Accessories

AmazonBasics Backpack for SLRDSLR Cameras and Accessories

  • Backpack holds and protects 2 smaller SLR/DSLR camera bodies, 3-4 lenses, and additional small accessories
  • Durable black polyester/nylon exterior; ample interior storage
  • Outer dimensions: 11.5 x 7.2 x 15.6 inches (292mm x 183mm x 396mm); Internal: 10 x 5 x 14.75 inches (254mm x 127mm x 374mm)
  • Distributed by Amazon.com; backed by one-year AmazonBasics warranty
  • Ships in Certified Frustration-Free Packaging
  • Ships in Certified Frustration-Free Packaging

      Product Dimensions: 11 x 6.1 x 14.5 inches ; 1.9 pounds

More Camera Accessories here.

The post Amazon Basics Backpack for SLR(DSLR) Cameras and Accessories appeared first on SLR Camera.


from SLR Camera http://ift.tt/1L0aVEe

Saturday, September 19, 2015

Nikon D7200 DX-format DSLR Camera

Nikon D7200 DX-format DSLR Camera


Introducing the Nikon D7200, the star of Nikons DX-format line-up. Bring your creative vision to life with photos and videos that shine with sharpness and clarity. Shoot in nearly any light-from dawn until after dusk-and capture everything from sports and action to wildlife and everyday moments. Then share your beautiful images easier than ever with a compatible smart device. Whether youre a passionate photographer or videographer looking for a tool to ignite your creativity, a pro in need of a nimble second camera or someone looking for an ideal blend of versatility and convenience, the D7200 is ready for your challenge.
FEATURES:
Your vision in stunning definition – Free of an optical low-pass filter, the D7200 produces remarkably pure, sharp photos and videos. Its 24.2 MP DX-format CMOS image sensor works together with EXPEED 4 image processing and NIKKOR lenses to enhance detail and tonality. This outstanding image quality is maintained all the way up to ISO 25,600 (two full stops higher than the D7200s predecessor) for amazing low-light images. You can also now expand the ISO range up to BW1 (51,200) and BW2 (102,400) to shoot monochromatic photos in even more challenging lighting situations. Whether shooting stills or video, selecting the 1.3x crop mode extends the reach of NIKKOR DX and FX-format lenses, getting you closer to sports, action, wildlife and more.
  • Nikons first DSLR with built-in Wi-Fi & NFC – Share your outstanding D7200 photos with no hassle, even when on the go. Just touch your compatible* smartphone or tablet with NFC to the D7200 to establish a Wi-Fi connection. Once connected, you can use your smart device to browse photos on the D7200 and then share your favorites by text message, email or posting online. You can also use your smart device as a remote for the Nikon D7200-see what the camera sees and take pictures! High-speed frame rate an

Product Description
From the Manufacturer
Share your creative vision in stunning definition with Nikon’s first DSLR to feature built-in Wi-Fi and Near Field Communication (NFC; NFC feature for Android v 4.0 or later smart devices only). A 24.2 megapixel DX-format CMOS image sensor with no optical low-pass filter captures remarkably pure, sharp photos and videos all the way up to ISO 25,600, while EXPEED 4 image processing and Nikon’s 51-point autofocus system helps deliver the speed to capture up to 6 fps. Add versatile video features, in-camera time-lapse and creative effects plus outstanding compatibility with the Nikon imaging system, and it’s easy to see why the D7200 is the new star of Nikon’s DX-format line-up.
Photo of the Nikon D7200 DSLR
I AM BORN TO BE EXTREME
For the first time, the exhilarating image quality, low-light capabilities and speed of a Nikon DSLR are available with the convenience of built-in Wi-Fi and Near Field Communication (NFC). Introducing the D7200, the new star of Nikon’s DX-format line-up. Bring your creative vision to life with photos and videos that shine with sharpness and clarity. Shoot in nearly any light, from dawn until after dusk, and capture everything from sports and action to wildlife and everyday moments. Then share your beautiful images easier than ever with a compatible smart device. Whether you’re a passionate photographer or videographer looking for a tool to ignite your creativity, a pro in need of a nimble second camera or someone looking for an ideal blend of versatility and convenience, the D7200 is ready for your challenge.
Nikon D7200 photo of a soccer player highlighting stunning, sharp photos and video
Transform the ordinary
Your vision in stunning definition
Free of an optical low-pass filter, the D7200 produces remarkably pure, sharp photos and videos. Its 24.2 MP DX-format CMOS image sensor works together with EXPEED 4 image processing and NIKKOR lenses to enhance detail and tonality. This outstanding image quality is maintained all the way up to ISO 25,600 (two full stops higher than the D7200’s predecessor) for amazing low-light images. You can also now expand the ISO range up to BW1 (51,200) and BW2 (102,400) to shoot monochromatic photos in even more challenging lighting situations. Whether shooting stills or video, selecting the 1.3x crop mode extends the reach of NIKKOR DX and FX-format lenses, getting you closer to sports, action, wildlife and more.
Nikon snapbridge logo and the D7200 and smartphone showing wireless connectivity
Share every thrilling creation
Nikon’s first DSLR with built-in Wi-Fi & NFC
Share your outstanding D7200 photos with no hassle, even when on the go. Just touch your compatible* smartphone or tablet with NFC to the D7200 to establish a Wi-Fi connection. Once connected, you can use your smart device to browse photos on the D7200 and then share your favorites by text message, email or posting online. You can also use your smart device as a remote for the D7200; see what the camera sees and take pictures!
Nikon D7200 photos of a motorcycle rider showing continuous shooting speed
Catch shots others might miss
High-speed frame rate and increased buffer
With its 6 fps* shooting capacity, the D7200 is an outstanding choice for sports, wildlife and other fast action. It has a large buffer capacity that can handle up to approx. 100 shots of continuous shooting when in JPEG/fine/large; up to approx. 27 shots in 12-bit lossless compressed RAW or up to approx. 18 shots when using 14-bit lossless compressed RAW and DX-format image size. Switch to 1.3x image size and capture approx. 7 fps* in continuous high-speed mode.
*When using live view, the maximum frame rate will be approx. 3.7 fps.
Nikon D7200 photos of a city landscape
Beautifully rendered time-lapse movies
Record daily life in stunning quality or experiment with new forms of creative expression. Create beautifully rendered time-lapse movies with smooth exposure variations entirely in-camera – a first for Nikon DX-format cameras. Make smooth exposure transitions with Auto ISO while monitoring with Highlight Display (Zebra Stripes). Apply Flat Picture Control for easier color grading in post. Transfer uncompressed footage onto an external recorder with the optional HC-E1 HDMI Cable while recording simultaneously to the internal SD memory card. Use the optional ME-W1 Wireless Microphone and record clear monaural audio from subjects as far as 164ft/50m away, or attach the optional ME-1 Stereo Microphone to the ME-W1 Wireless Microphone’s remote unit for stereo recording.
Nikon D7200 photos of a woman dancing with a man
Focus on challenging situations
Whether you’re capturing images in daylight or after dusk, the D7200’s superb AF system will keep up. Its Advanced Multi-CAM 3500 II autofocus sensor module achieves outstanding focus detection, even at a very dim -3 EV (ISO 100, 20C/68F). Its high-density 51 focus points cover a wide area of the frame in DX format and most of the frame in 1.3x Crop Mode, while 15 cross-type sensors in the center provide higher detection strength. One center AF point even works all the way to f/8, for greater focusing performance when using teleconverters.
Supplied Accessories
D7200 Body Only
EN-EL15 Rechargeable Li-ion Battery
MH-25A Battery Charger
UC-E17 USB Cable
AN-DC1 Neck Strap
DK-5 Eyepiece Cap
DK-23 Rubber Eyecup
BF-1B Body Cap

Find out more Nikon SLR cameras.

http://slrcamera.org/product/nikon-d7200-dx-format-dslr-body-black/

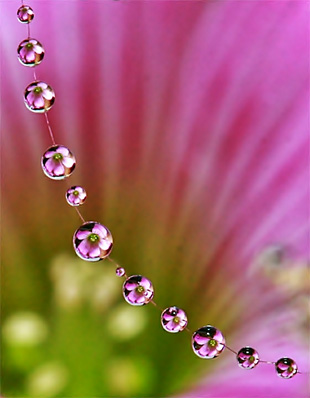
Adding Dew Drops to Enhance Macro Nature Photography

Adding Dew Drops to Enhance Macro Nature Photography

Here is a secret weapon to add to your camera bag. It’s another simple tip that can take your nature photos to a whole new level!

dew drop photography
Photo captured by Agus Supriyanto

Flower photography is what got a lot of us interested in photography in the first place. Even if flower photography wasn’t part of you getting bitten by the photo bug, and you have no interest in them at all, they’re a very good subject to practice on and learn to master your photo equipment.
Have you noticed that with most stunning flower photos, they are covered with dew drops?
The same with spider webs. In fact, in this case, dew drops are an essential element of the shot. They shimmer, sparkle, and reflect, and they really make your photo come to life! In fact, without dew drops, a spider web photo is fairly boring.
Here is a secret… the dew drops are rarely—if ever—real.
The photographer’s secret weapon that should always be in your camera bag is a small spray bottle of water.
This way, no matter what time of day you’re shooting and no matter if there is dew or not, just give the flower a few spritzes and voila! You have a dew covered flower.
dew on grass
“Dewdrops4” captured by Anja Pietsch

That’s how the pros do it, they are not searching out flowers and spider webs with natural dew drops!
Here is another tip. Sometimes with a spray bottle, we don’t get “dew drops” that are big enough to read well in the photo. Do you want the dew drops to be a bit bigger?
Try adding some glycerin to the water. It will help the water molecules bond together and make bigger “dew drops.” By the way, if you get thirsty, don’t drink the water and glycerin mix. Hydrate in some other way.
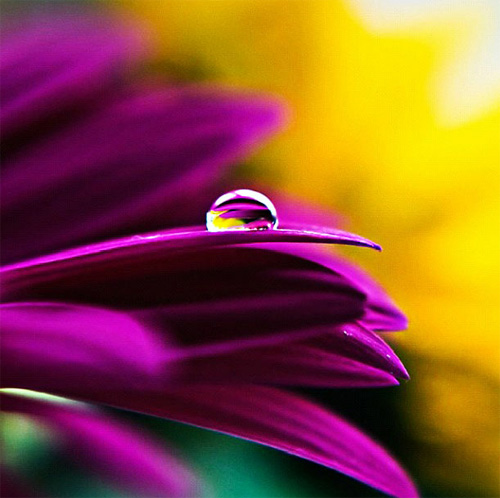
Adding glycerin and making the drops larger is almost essential if you want to get one of those close-up shots of a single dew drop reflecting the flowers behind it. Theese types of photos have better than average chance of doing well in photo contests.
dew drop
“h2o” captured by trek
Make today the day you commit to being the kind of photographer you dreamed of being when you first got into photography. You can do it—it’s not that hard. Add a glycerin-water bottle to your camera bag so it’s always available, and use flowers and spider webs as practice subjects. Who knows, that next photo contest winner could be you!

About the Author:
Dan Eitreim writes for ontargetphototraining.com. He has been a professional photographer in Southern California for over 20 years. His philosophy is that learning photography is easy if you know a few tried and true strategies.

Go to full article: Adding Dew Drops to Enhance Macro Nature Photography
What are your thoughts on this article? Join the discussion on Facebook or Google+

Article from: PictureCorrect


http://slrcamera.org/adding-dew-drops-to-enhance-macro-nature-photography/

This entry was posted in SLR Camera Guide and tagged . Bookmark the permalink

Sony A7S II Hands-on Review

Sony updates its video and low-light Alpha 7-series CSC with internal 4K recording, better noise control and improved autofocusing. Find out our head of testing’s first impressions in her Sony A7S II hands-on review.

Sony A7S II Hands-on Review

After the introduction of the Sony Alpha 7 II and Sony Alpha 7R II it was only a matter of time before Sony introduced the update to the Alpha 7S, its low light and video-centric model. The company chose to announce the Alpha 7S II at this year’s IBC show in Amsterdam (Jump To Sony A7S II price and specs).
Like the A7R II, the latest edition to the Sony Alpha range allows internal 4K recording in XAVC S format with no pixel binning. The Alpha 7S is also 4K-enabled, but it can only record it to an external device.
In addition, Full-HD footage can be recorded at up to 120fps (frames per second) at 100Mbps with no pixel binning – for super-slow motion playback.

The A7S-series is also designed for low-light shooting and as before, the maximum sensitivity setting is ISO 409,600. The native range is of ISO 100-102,400. There’s also the 5-axis image stabilisation that we’ve seen in the A7 II and A7R II, for smoother footage and sharper images.
Like the original A7S, at the heart of the A7S II is a full-frame 12.2Mp Exmor CMOS sensor. Keeping the pixel count low while having a larger sensor means that the photo receptors (aka pixels) can be made larger to create a stronger image signal.
Also, according to Sony’s Masaaki Oshima, Deputy General Manager of the Digital Imaging Business Group’s Imaging Products and Solutions Sector, although the new camera uses the same sensor and processing engine as the A7S, new circuitry and improved noise reduction algorithms mean that noise is controlled much better than before.
Unfortunately I am told that a firmware update will not elevate the A7S to the same standard of noise control.

Sony’s Picture Profiles are also available to allow videographers to tailor the appearance of video (and stills) in-camera. These make it possible to set specific values for Black Level, Gamma and Knee (highlight compression) as well as color adjustment (Color Mode, Color Level, Color Phase and Color Depth) and Detail.
The Gamma settings include Sony’s S-Log2 as well as the new S-log3 setting. These can increase dynamic range by up to 1300% by creating very flat looking footage that is ideal for post-capture grading.
A new Gamma Display Assist option lets you see the scene with natural contrast even though you’re shooting with a S-Log gamma setting.
While S-Log2 is especially useful for preserving brighter tones, S-Log3 is designed to capture the maximum tonal range in shadow to mid-tone areas.
Sony has also increased the number of autofocus (AF) points available to 169 and claims a 2x faster AF response in video mode.

Sony A7S II hands-on review: Build and handling

Sony A7S II hands-on review: Build and handling

In response to criticisms of the design of the original A7, A7R and A7S, Sony has made changes to the Mark II versions. These including making the grip bigger, moving the shutter release forward on to the top of the grip and shifting the video record button onto the side of the thumb-grip on the back of the camera to avoid is being pressed accidentally.
Because it’s awkward to press the newly located video button when hand-holding the camera, I find it’s better to set one of the two customisation buttons on the top-plate to activate video.
Like the A7 II and A7R II, the new A7S II feels well made and is comfortable to hold, with most controls being within easy reach. The new camera is tougher than the original model, with more magnesium alloy and a reinforced lens mount.
 
The menu layout is largely the same as the A7R Mark II’s. There’s also the same high level of customisation available.
However, my criticisms of the A7R II’s menu and Function menu can also be made of the A7S II.
It would be nice to have separate sections within the main menu for stills and video controls, plus a second Function Menu for video options. I passed these comments on to Sony’s engineers at the launch and the response was positive, so fingers crossed.
Sony’s XGA OLED Tru-Finder has the World’s highest magnification (0.78x) and it provides an impressive view when composing images with the camera held to your eye.

Sony A7S II hands-on review: Performance

Sony A7S II hands-on review: Performance

I haven’t been able to shoot anything with the A7S II yet, but the original camera impressed when I reviewed it and the sample stills and videos I have seen from the new model look very impressive.
Naturally, as it has a lower pixel count than the A7R II and A7 II, the Alpha 7S II can’t resolve as much detail as its stablemates in stills, but there should still be enough information to make high-quality A3 prints.

Meanwhile 4K and Full-HD footage should have higher quality because it’s generated using larger photo sites.
In my test of the original A7S I found that noise is controlled well, but the top ISO 409,600 setting is best avoided.
As this remains an expansion setting, I suspect that the same is true of the new camera, but I will investigate it when we get a full production sample in for testing.
Sony is claiming a big improvement in the A7S’s autofocus capability and judging by a demonstration I saw involving a stuffed toy in a dark box, it’s good.
In more average lighting conditions it’s fast and accurate. I’m looking forward to testing it properly.

Sony A7S II hands-on review: Early Verdict

Sony A7S II hands-on review: Early Verdict

Over half of the people who bought the A7S are professional photographers, with many using it to shoot video, building a rig around it to enable 4K recording.
With the 24Mp A7 II and 42Mp A7R II also in the A7-series, there is no pressure for Sony to increase the pixel count of the A7S II and it can concentrate on making it’s handing and performance better – especially for videographers.

The ability to record 4K in-camera allows these users a bit more freedom plus the ability to travel lighter and work more discretely. Meanwhile the improvement in the AF and noise control will be widely appreciated.

Those looking for an ‘all-rounder’ camera are best off looking at the A7 II, or even the A7R II if they can stomach the cost, but the A7S and A7S II are intended to produce the best image quality.

The A7S really impressed when we tested it and the improvements brought by the A7S II should make it even more attractive.

The post Sony A7S II Hands-on Review appeared first on Digital Camera World.
Digital Camera World » Reviews

Interested in Digital Camera tips ? Click here for more details.

This entry was posted in SLR Camera Guide and tagged , , . Bookmark the permalink.